Evil Queen Poison Apple
Share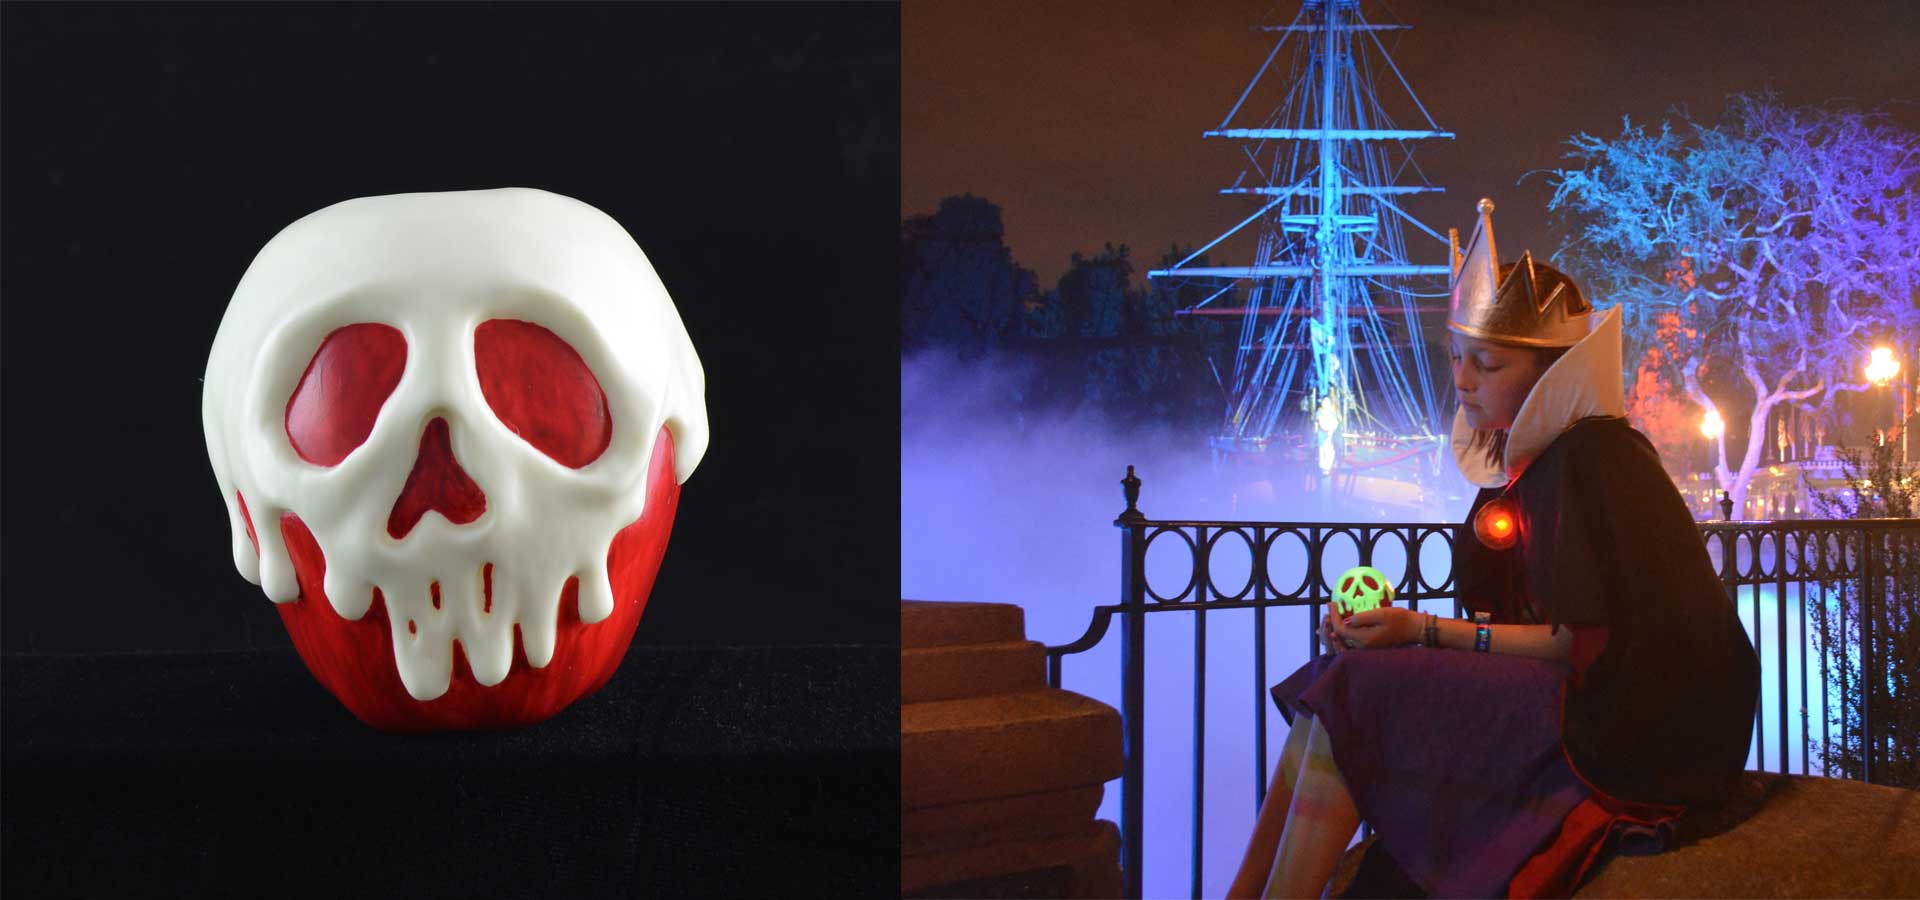
Project Description
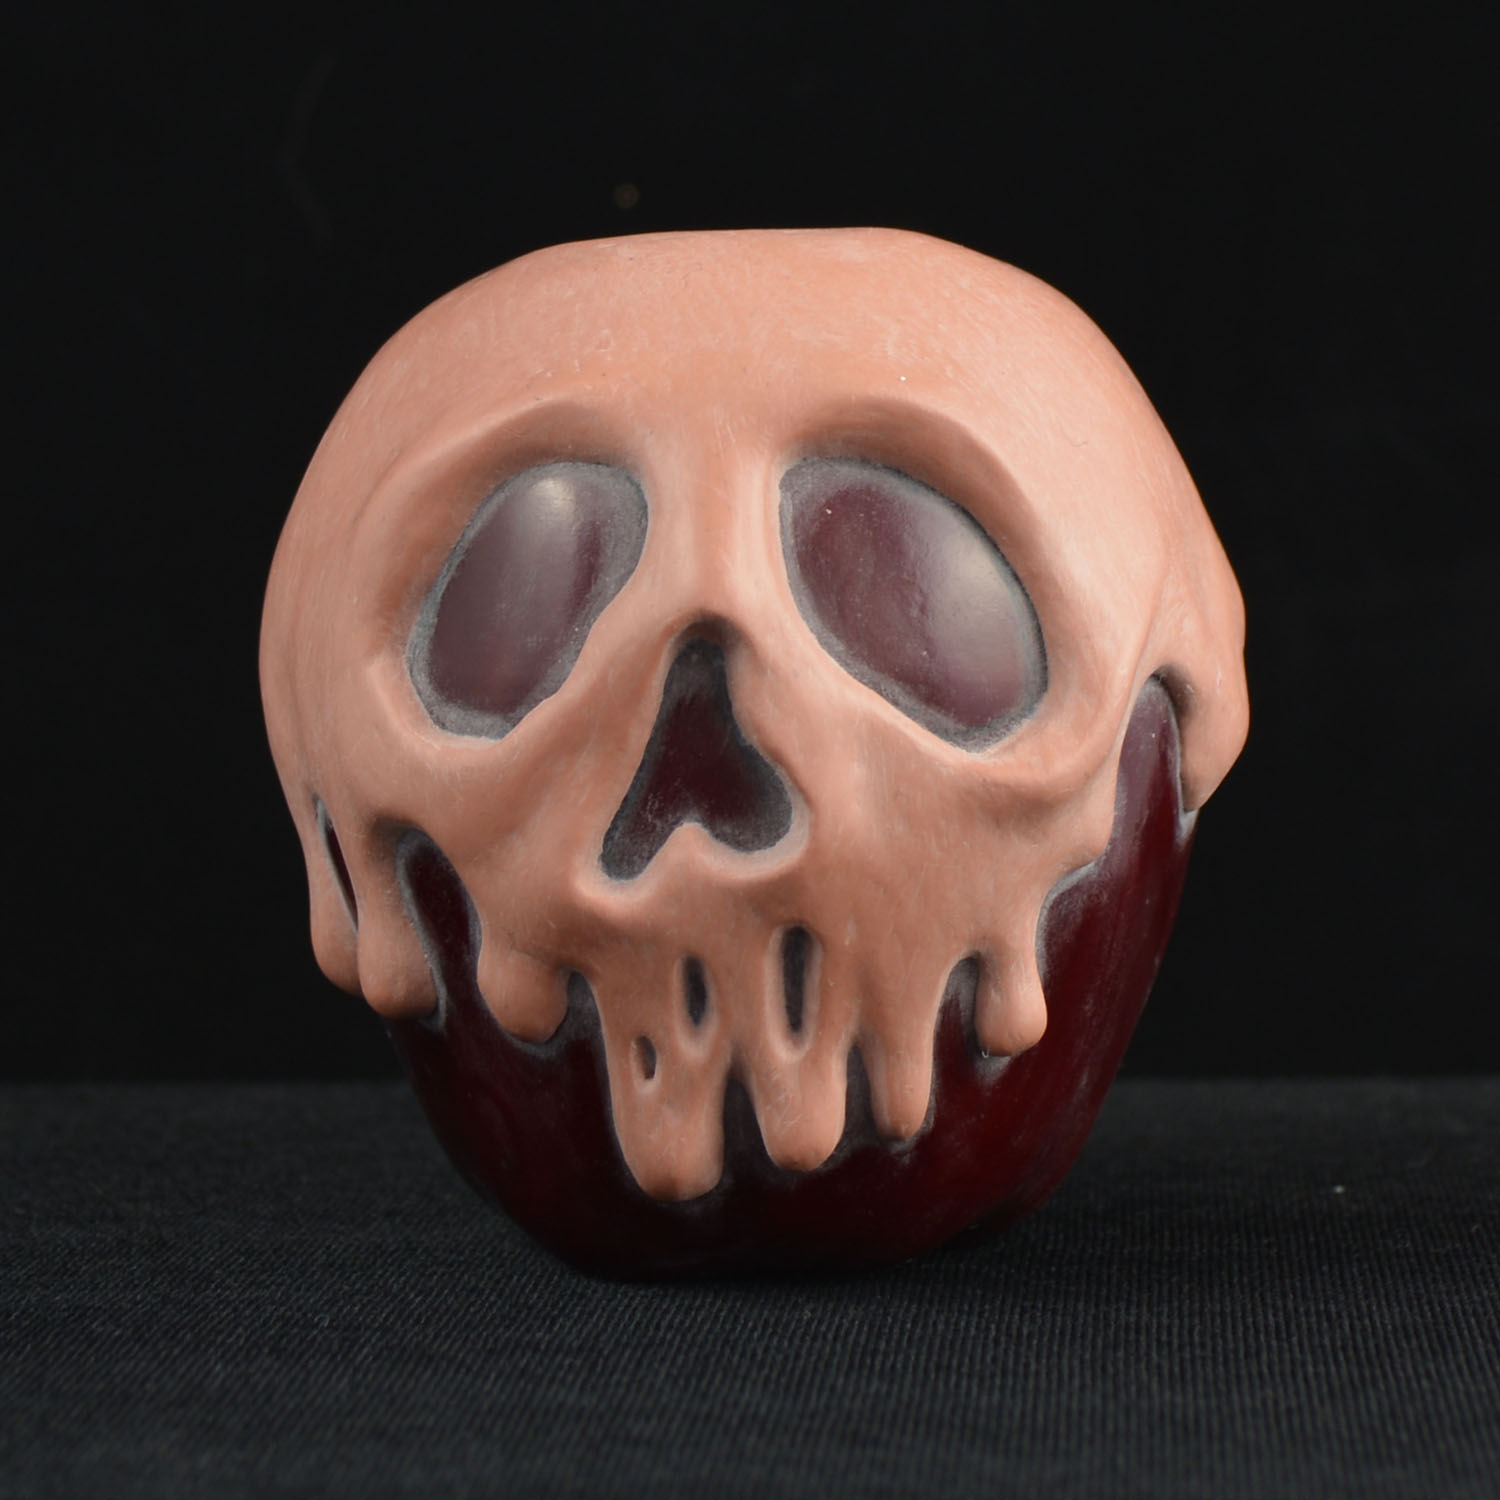
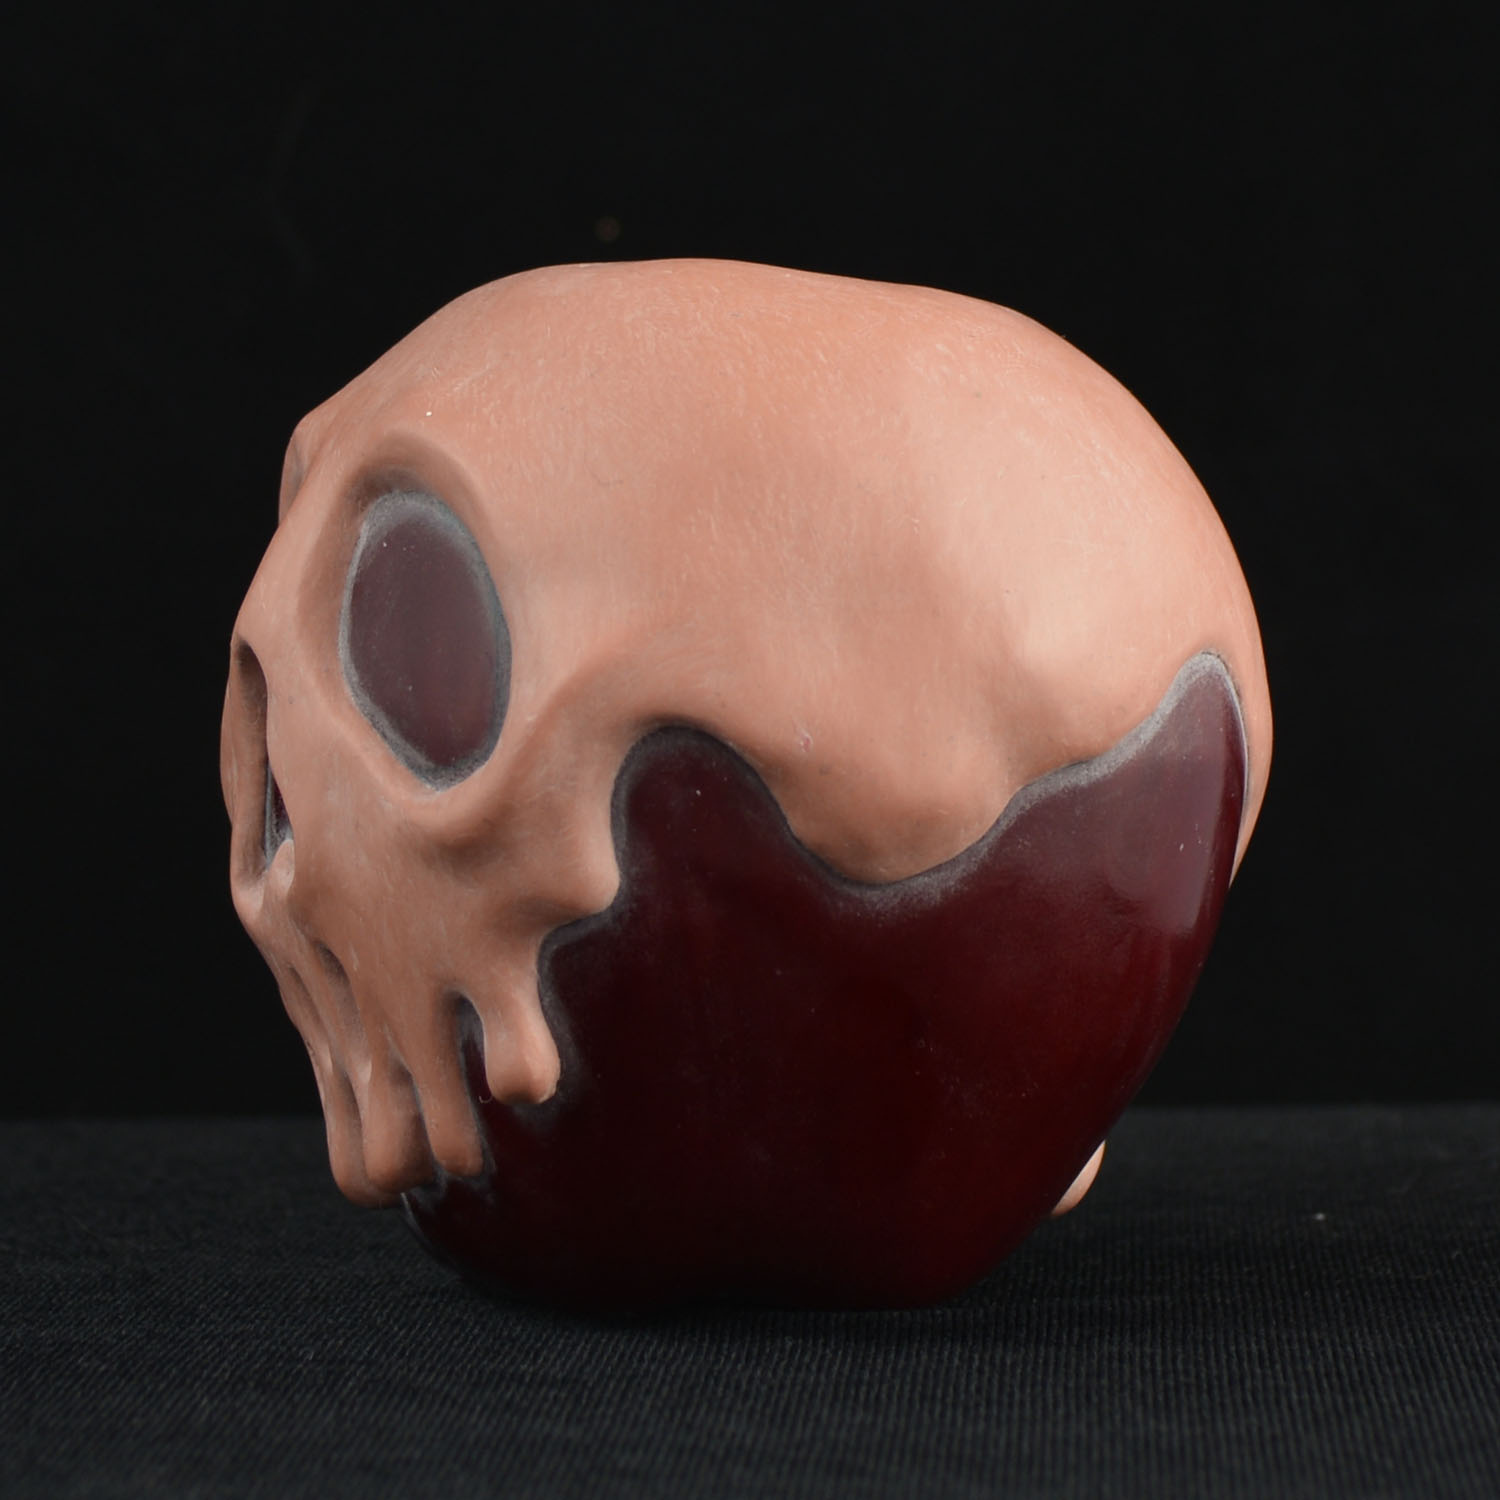
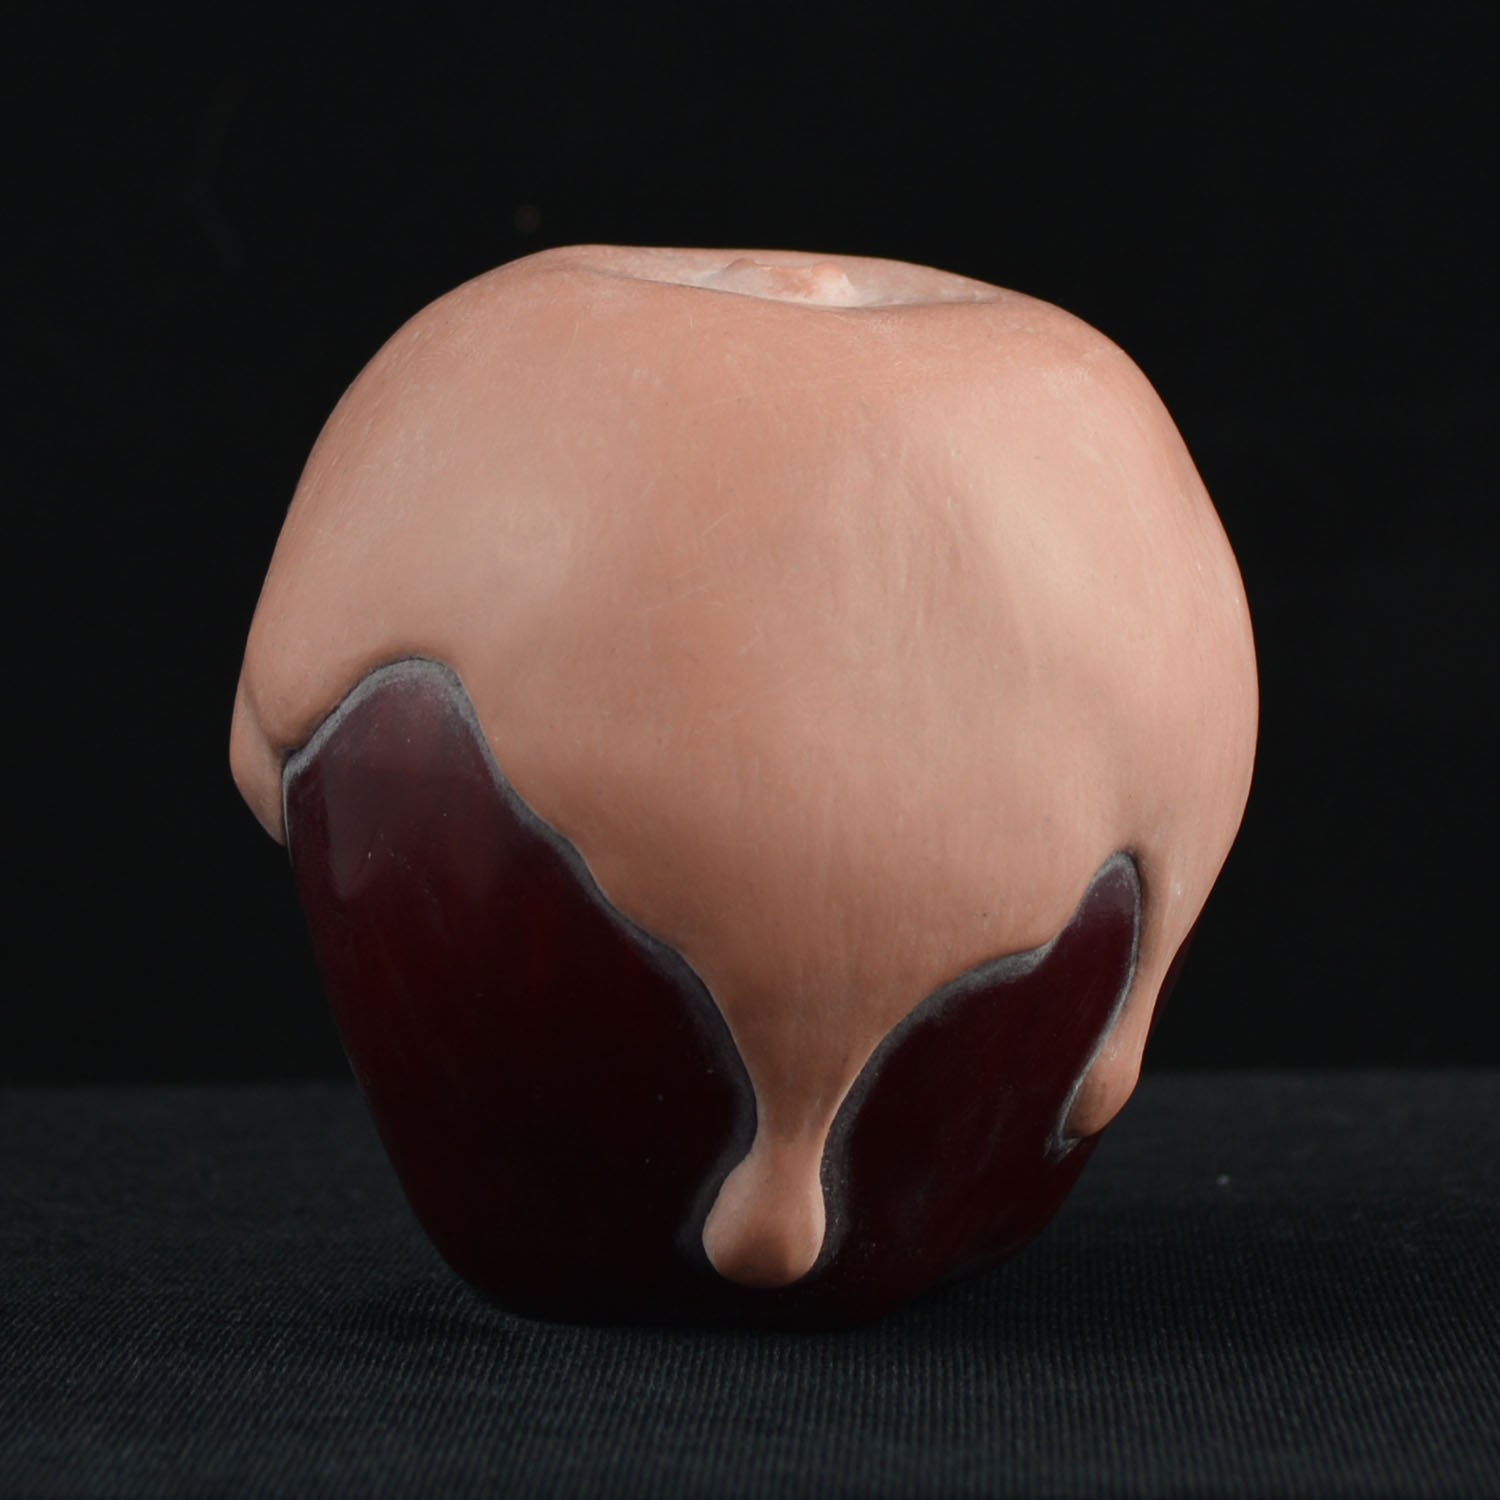
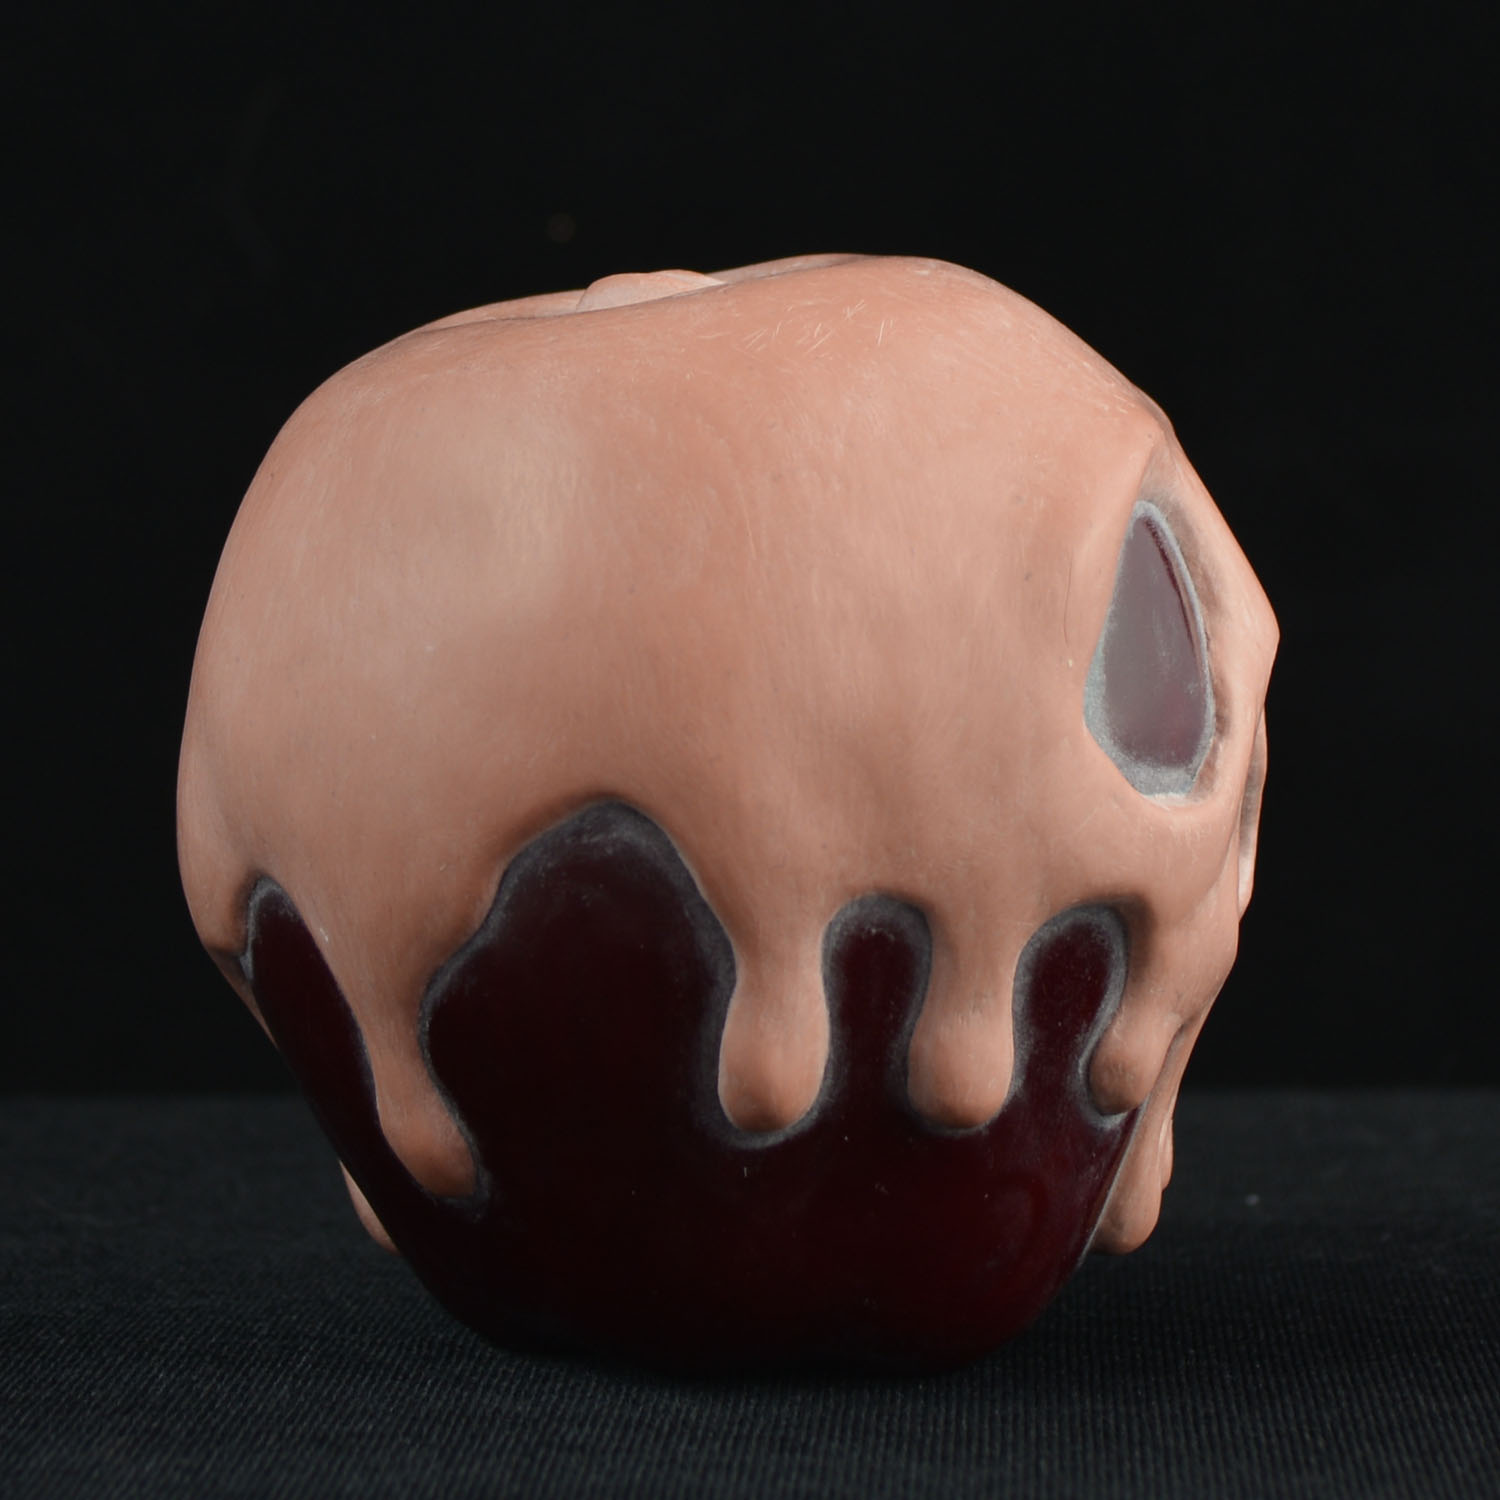
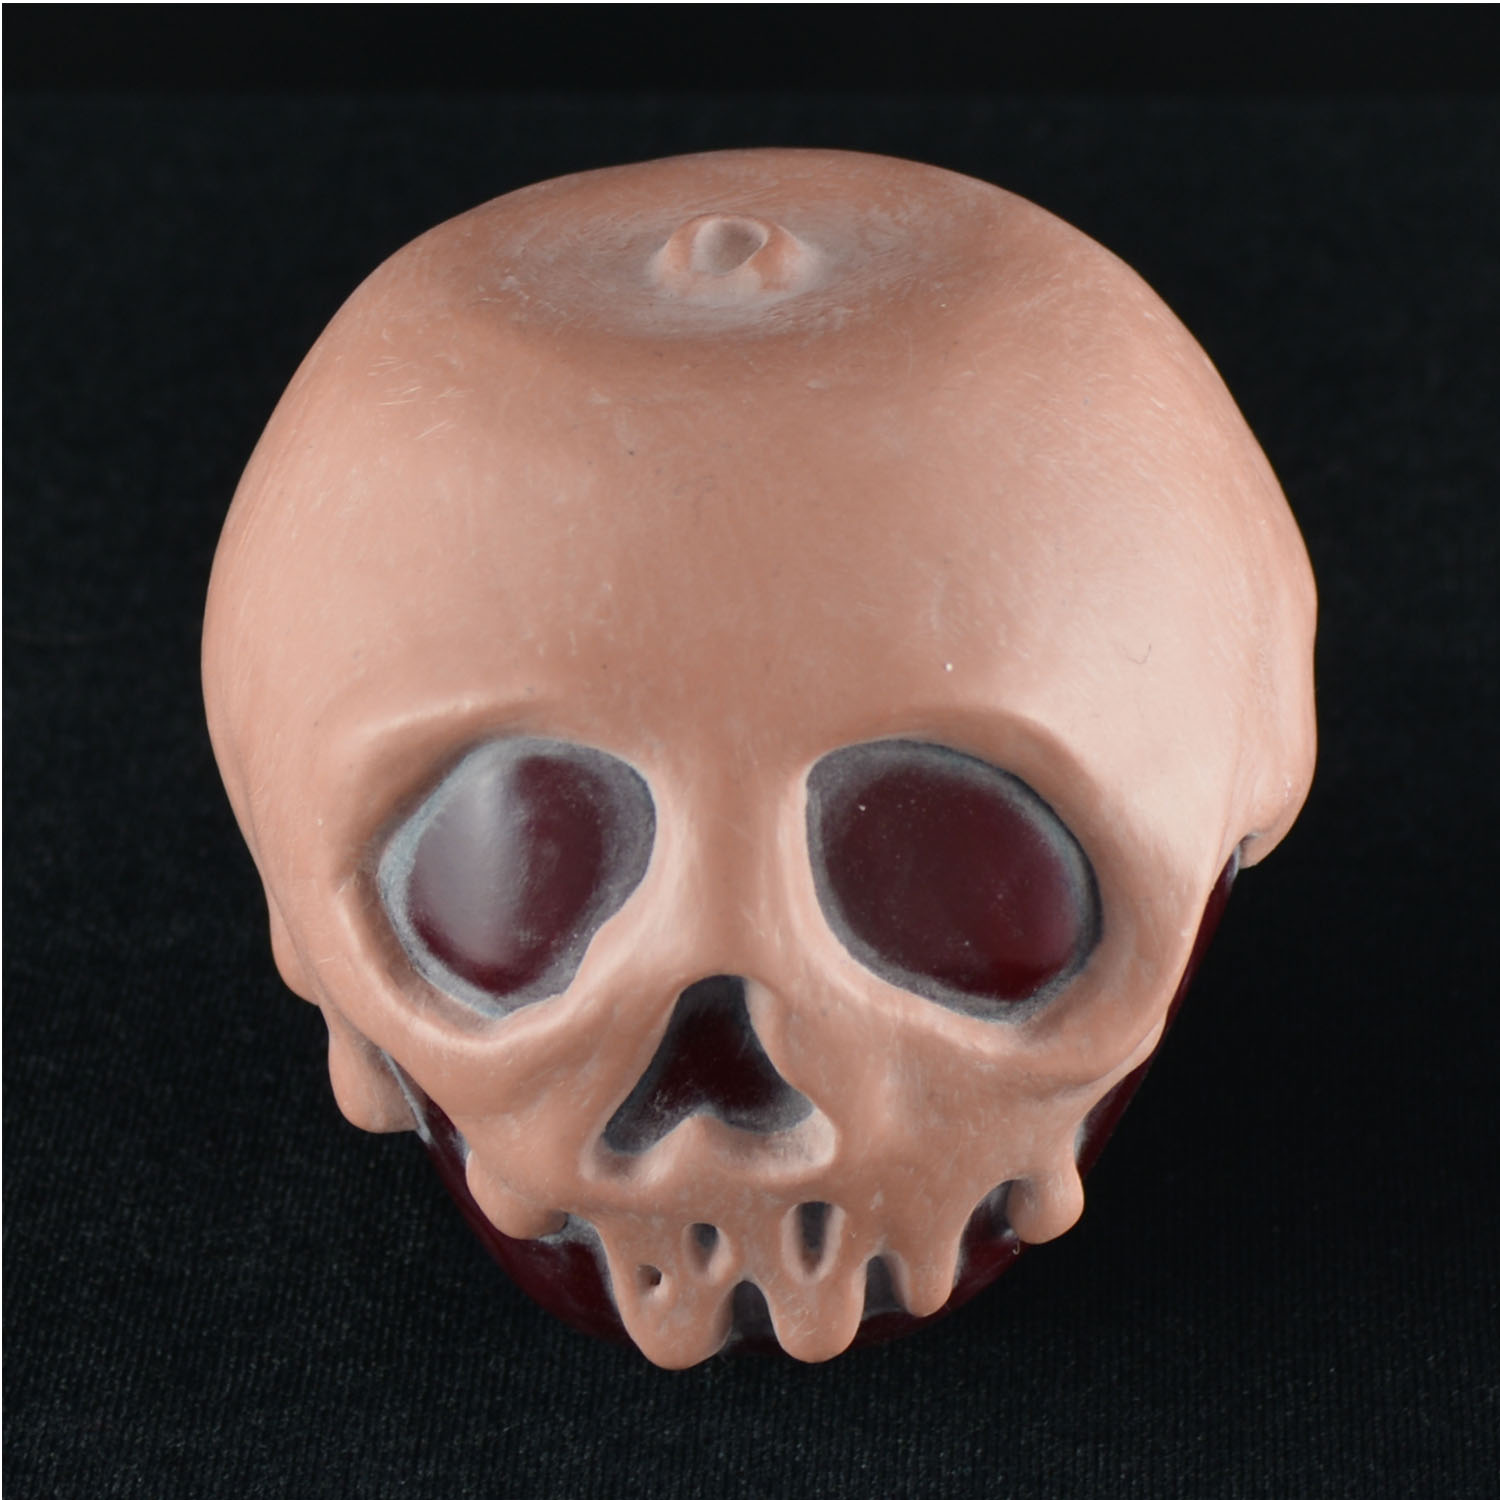
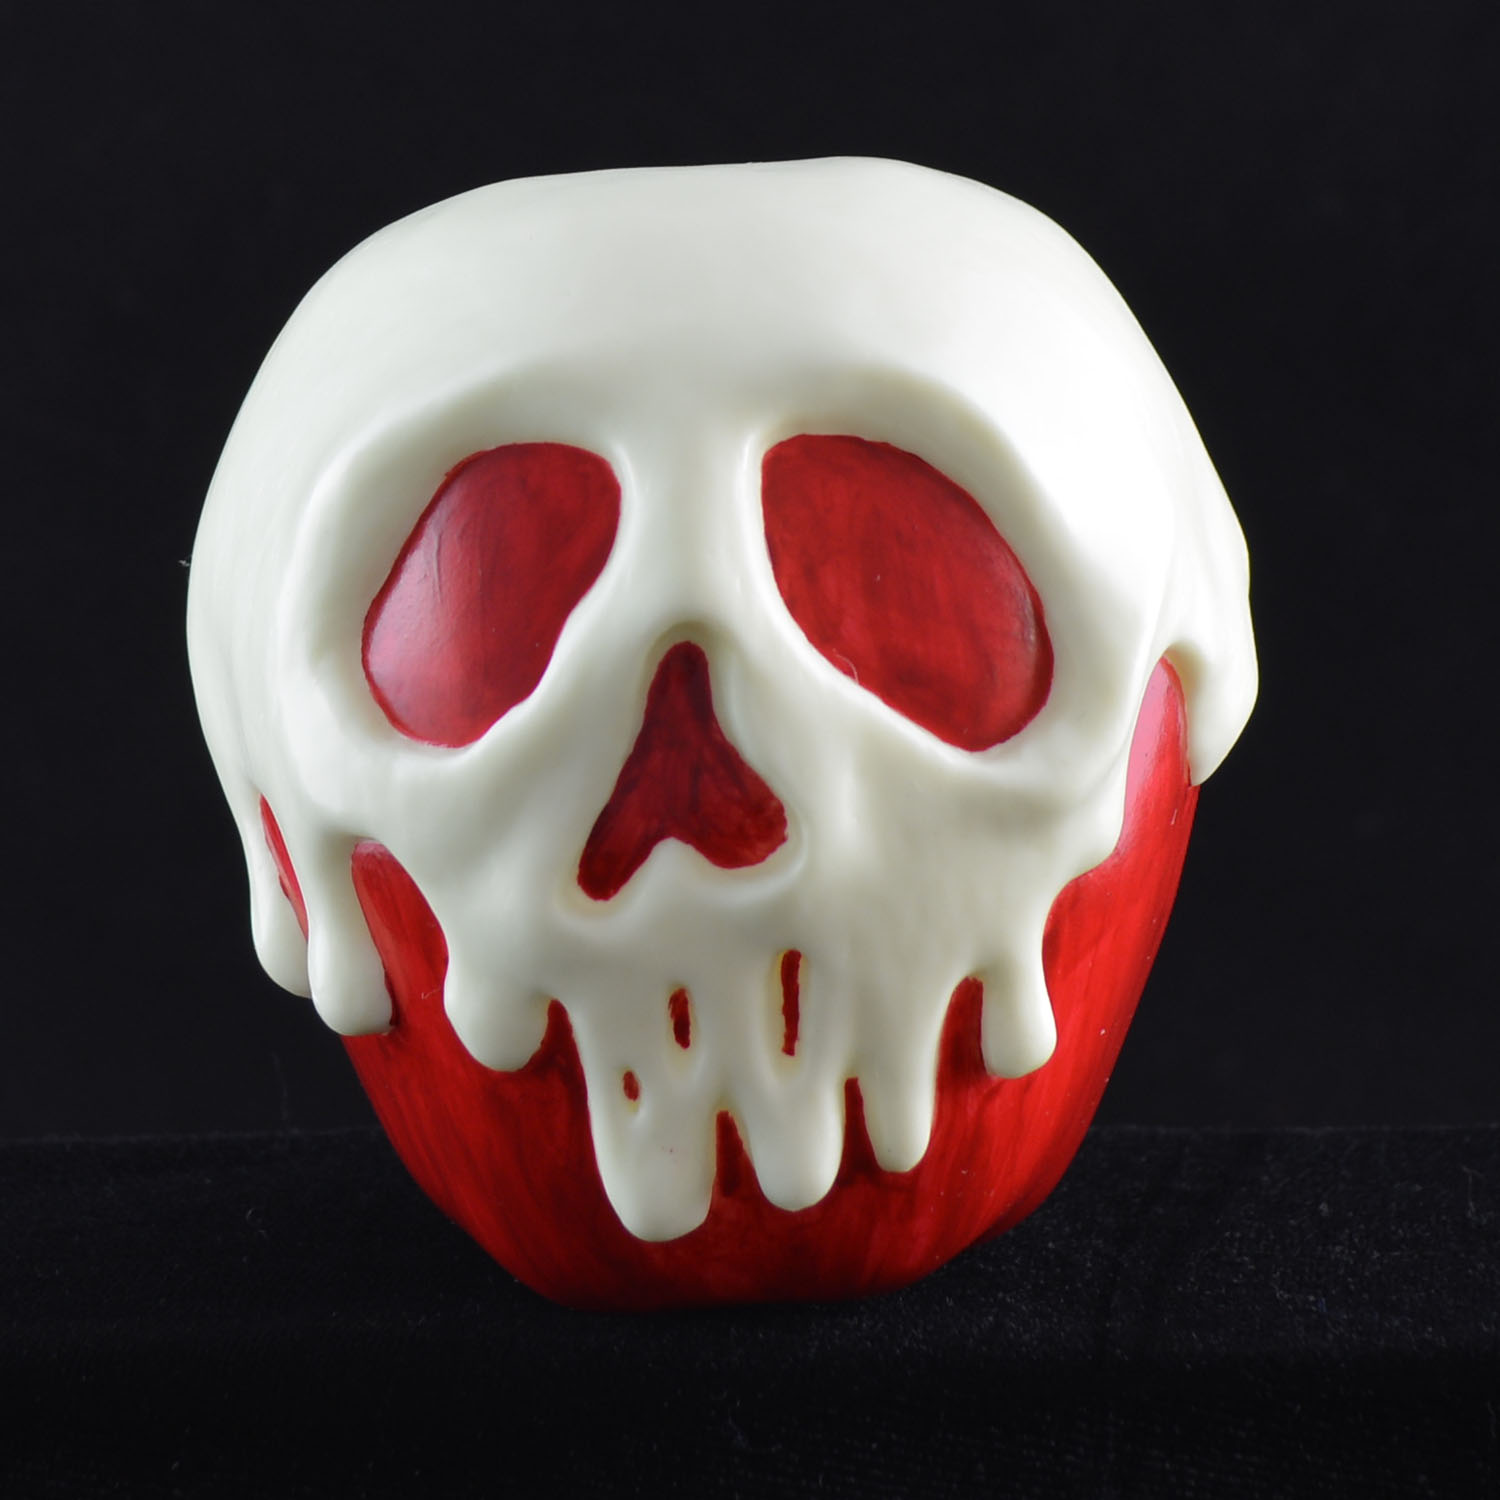
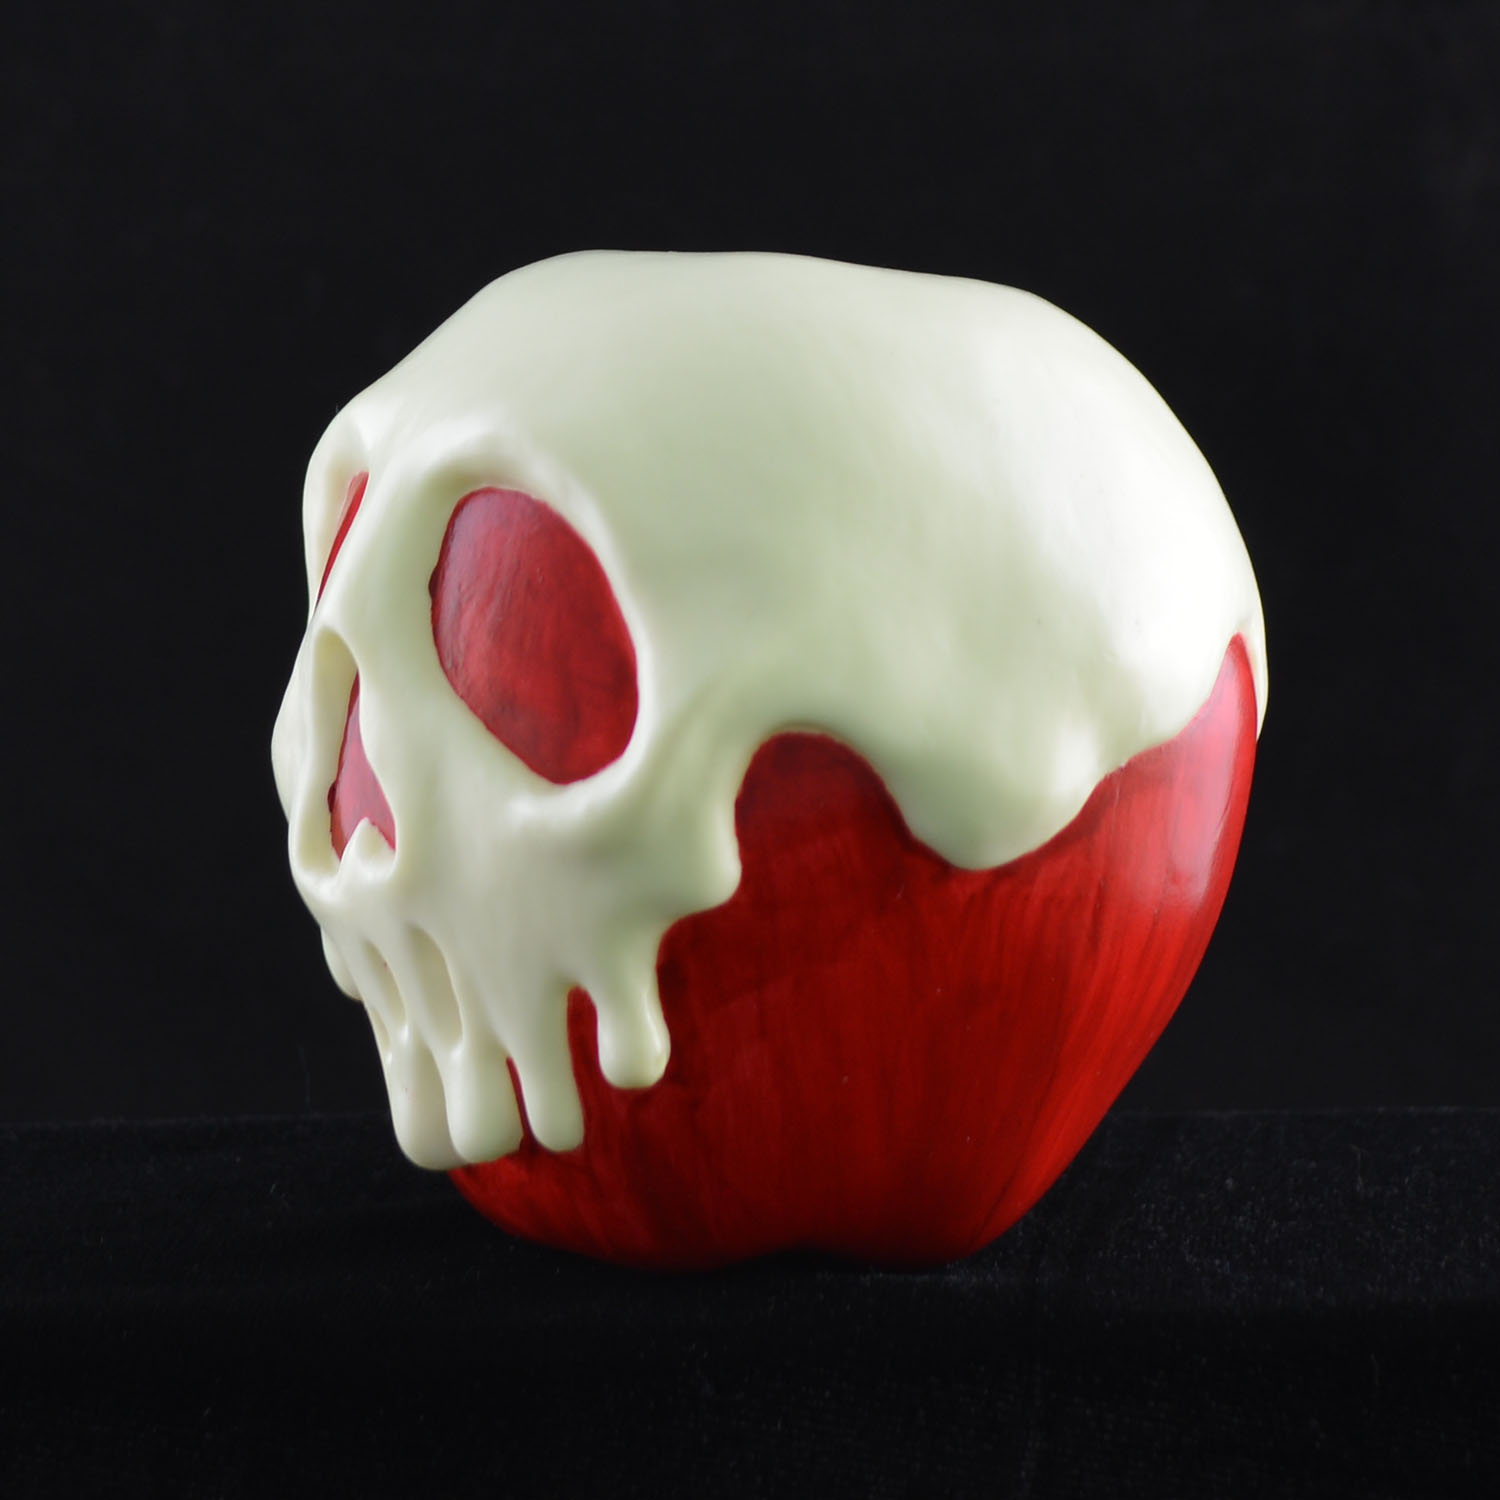
My daughter planned to be the Evil Queen from Snow White, for Halloween this past year. Costume aside, she needed a couple of accessories, including a poison apple. Rather than just have her carry around an apple, we thought we’d spice it up a bit, and replicate the cool-looking one, with the skull caramel. As a base for sculpting, I found some fake apples on Amazon. After grabbing some Chavant clay, it was off to the races. The final goal was to mold the entire piece, cast it in glow-in-the-dark resin, and then paint the apple bits.
Project Details
Client Ava
Date Halloween 2016
Skills Sculpting, Molding, Casting, Painting
Sculpting an Apple
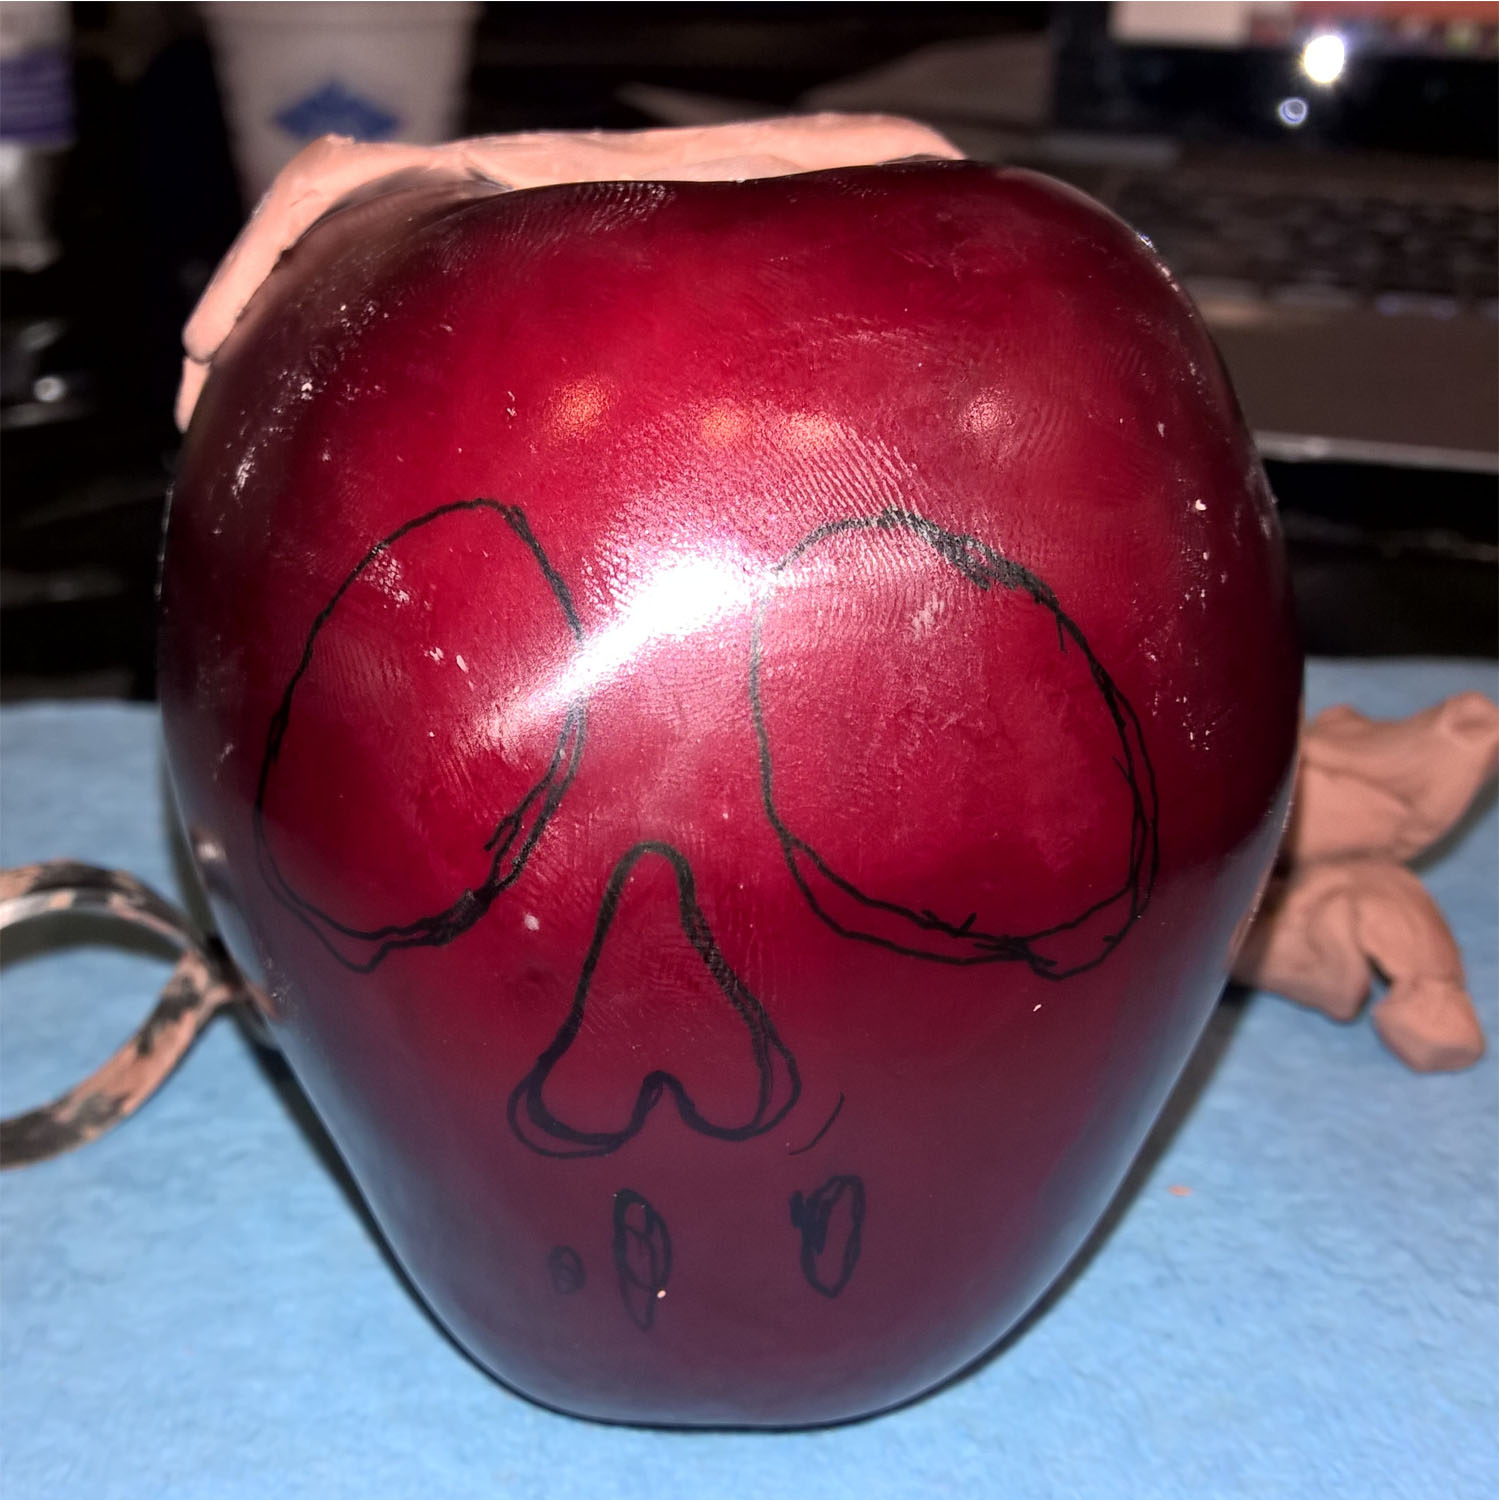
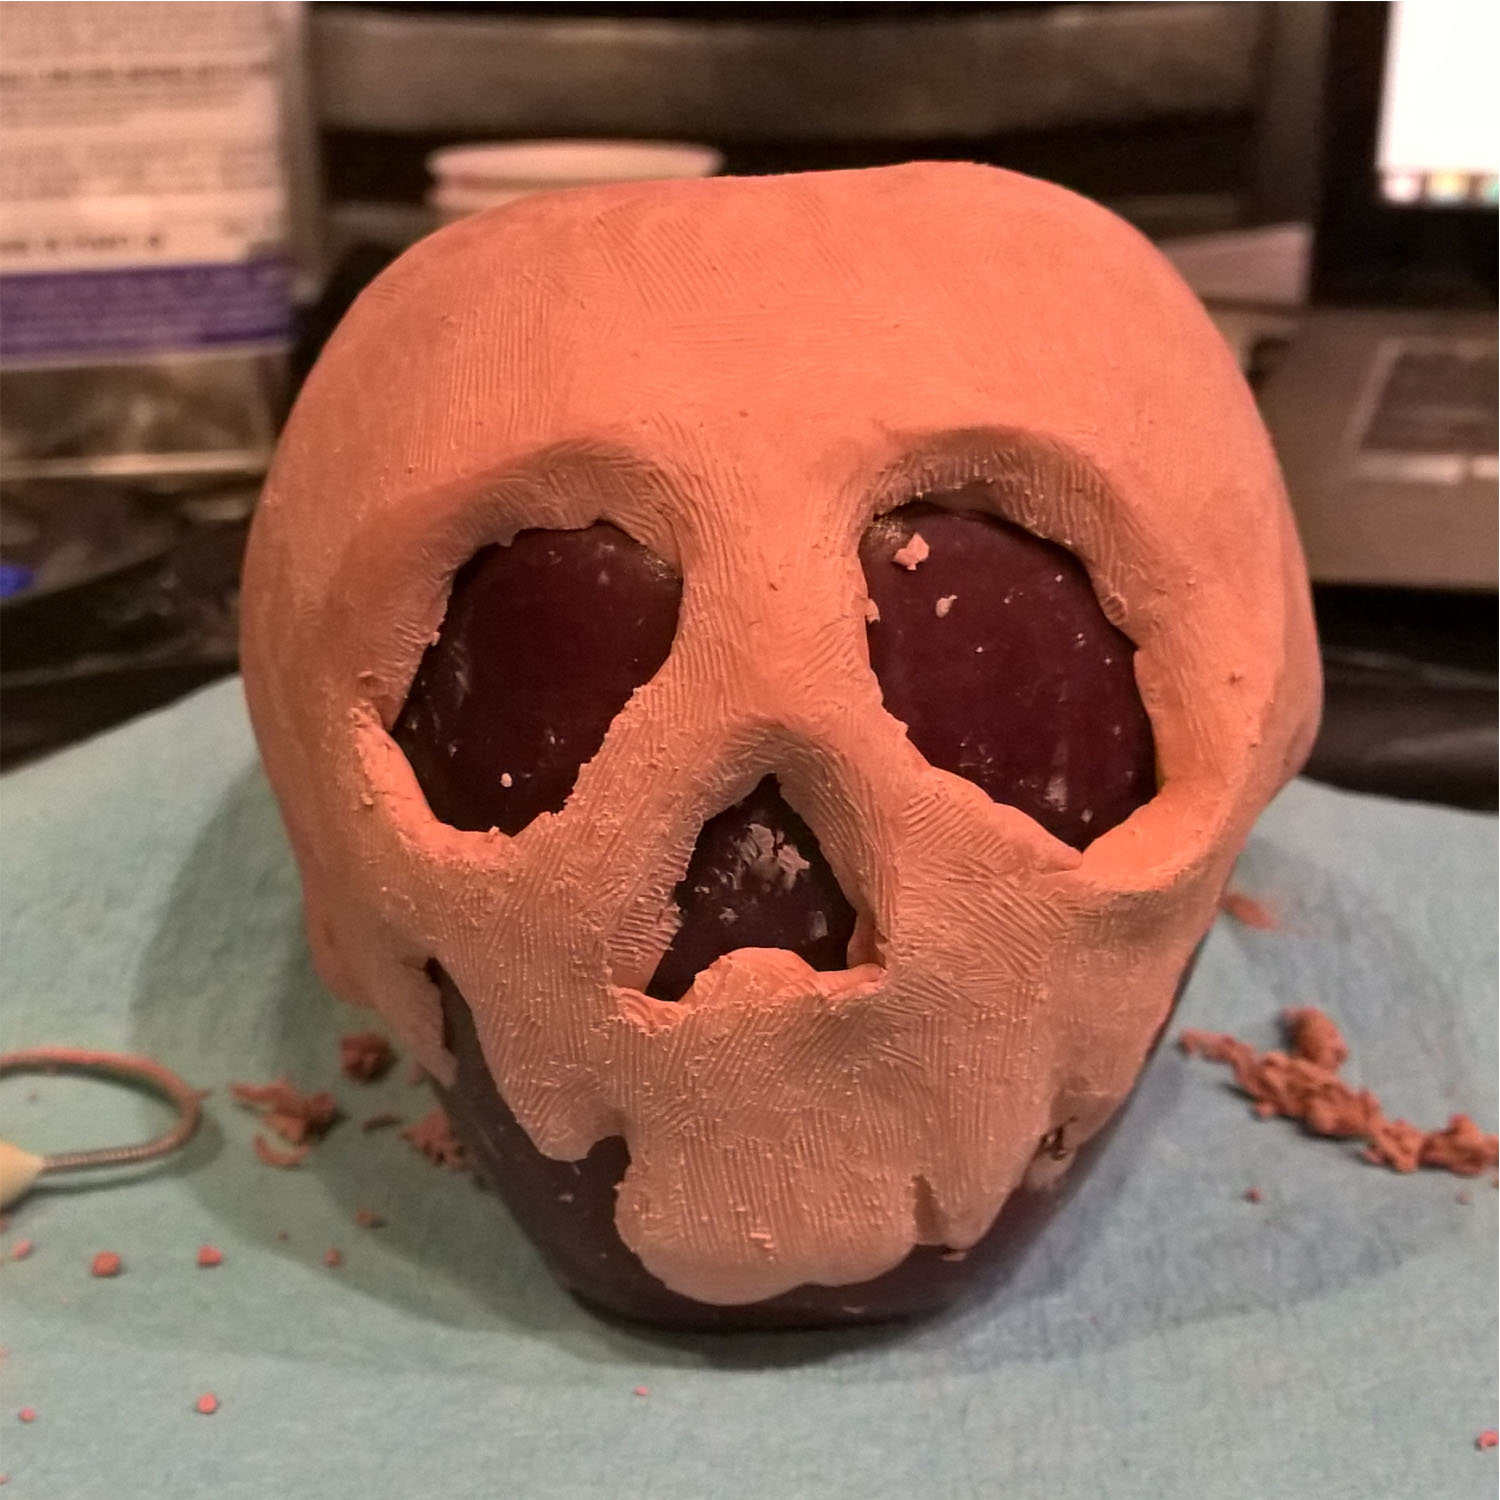
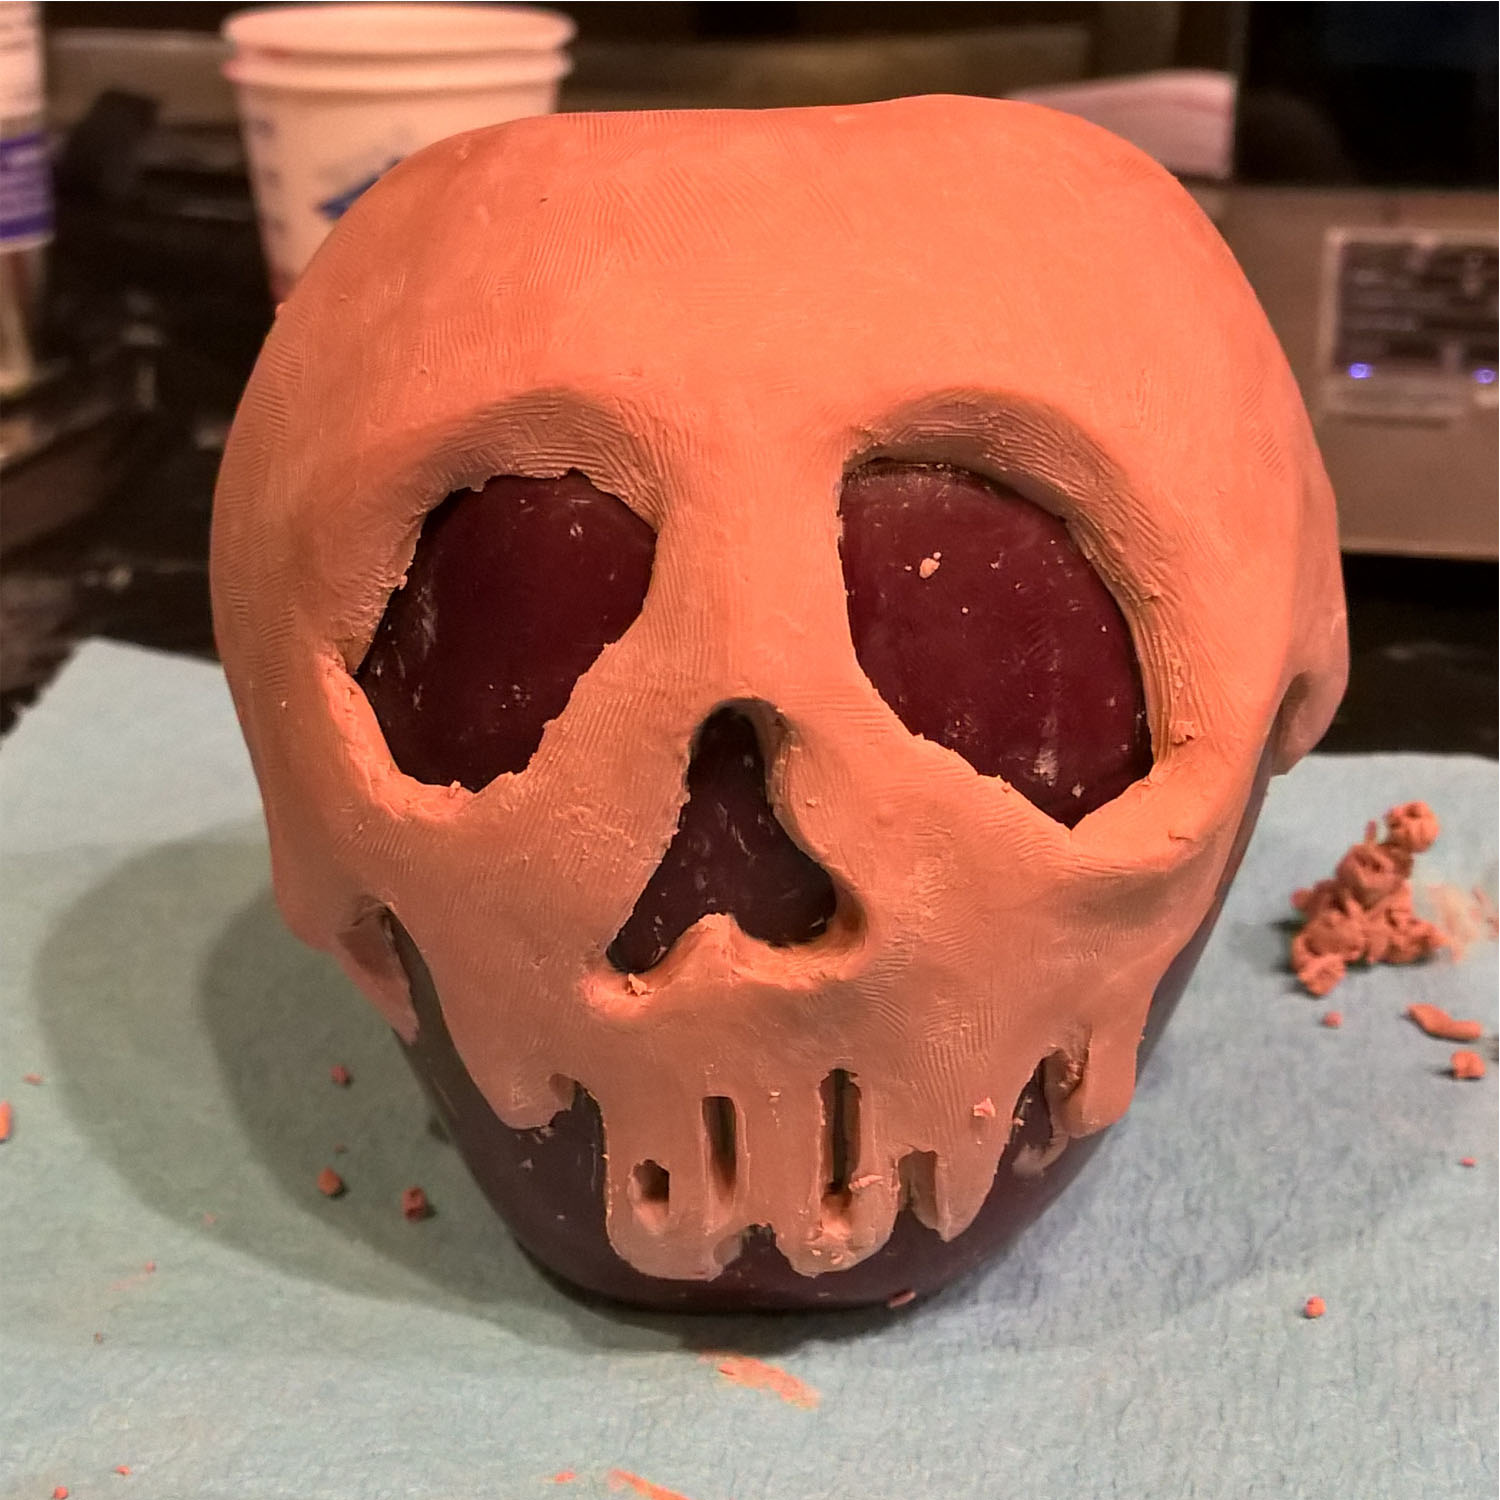
The whole project started with a slight shortcut, by using a plastic apple from Amazon (they’re actually styrofoam, coated with an extremely thin layer of plastic). The stem was tossed out, and the basic outline, where the skull caramel would go, was drawn on the apple. Chavant NSP Medium was the clay of choice for this project. The basic shape was roughed in, and then detailed with various loop tools.
Molding
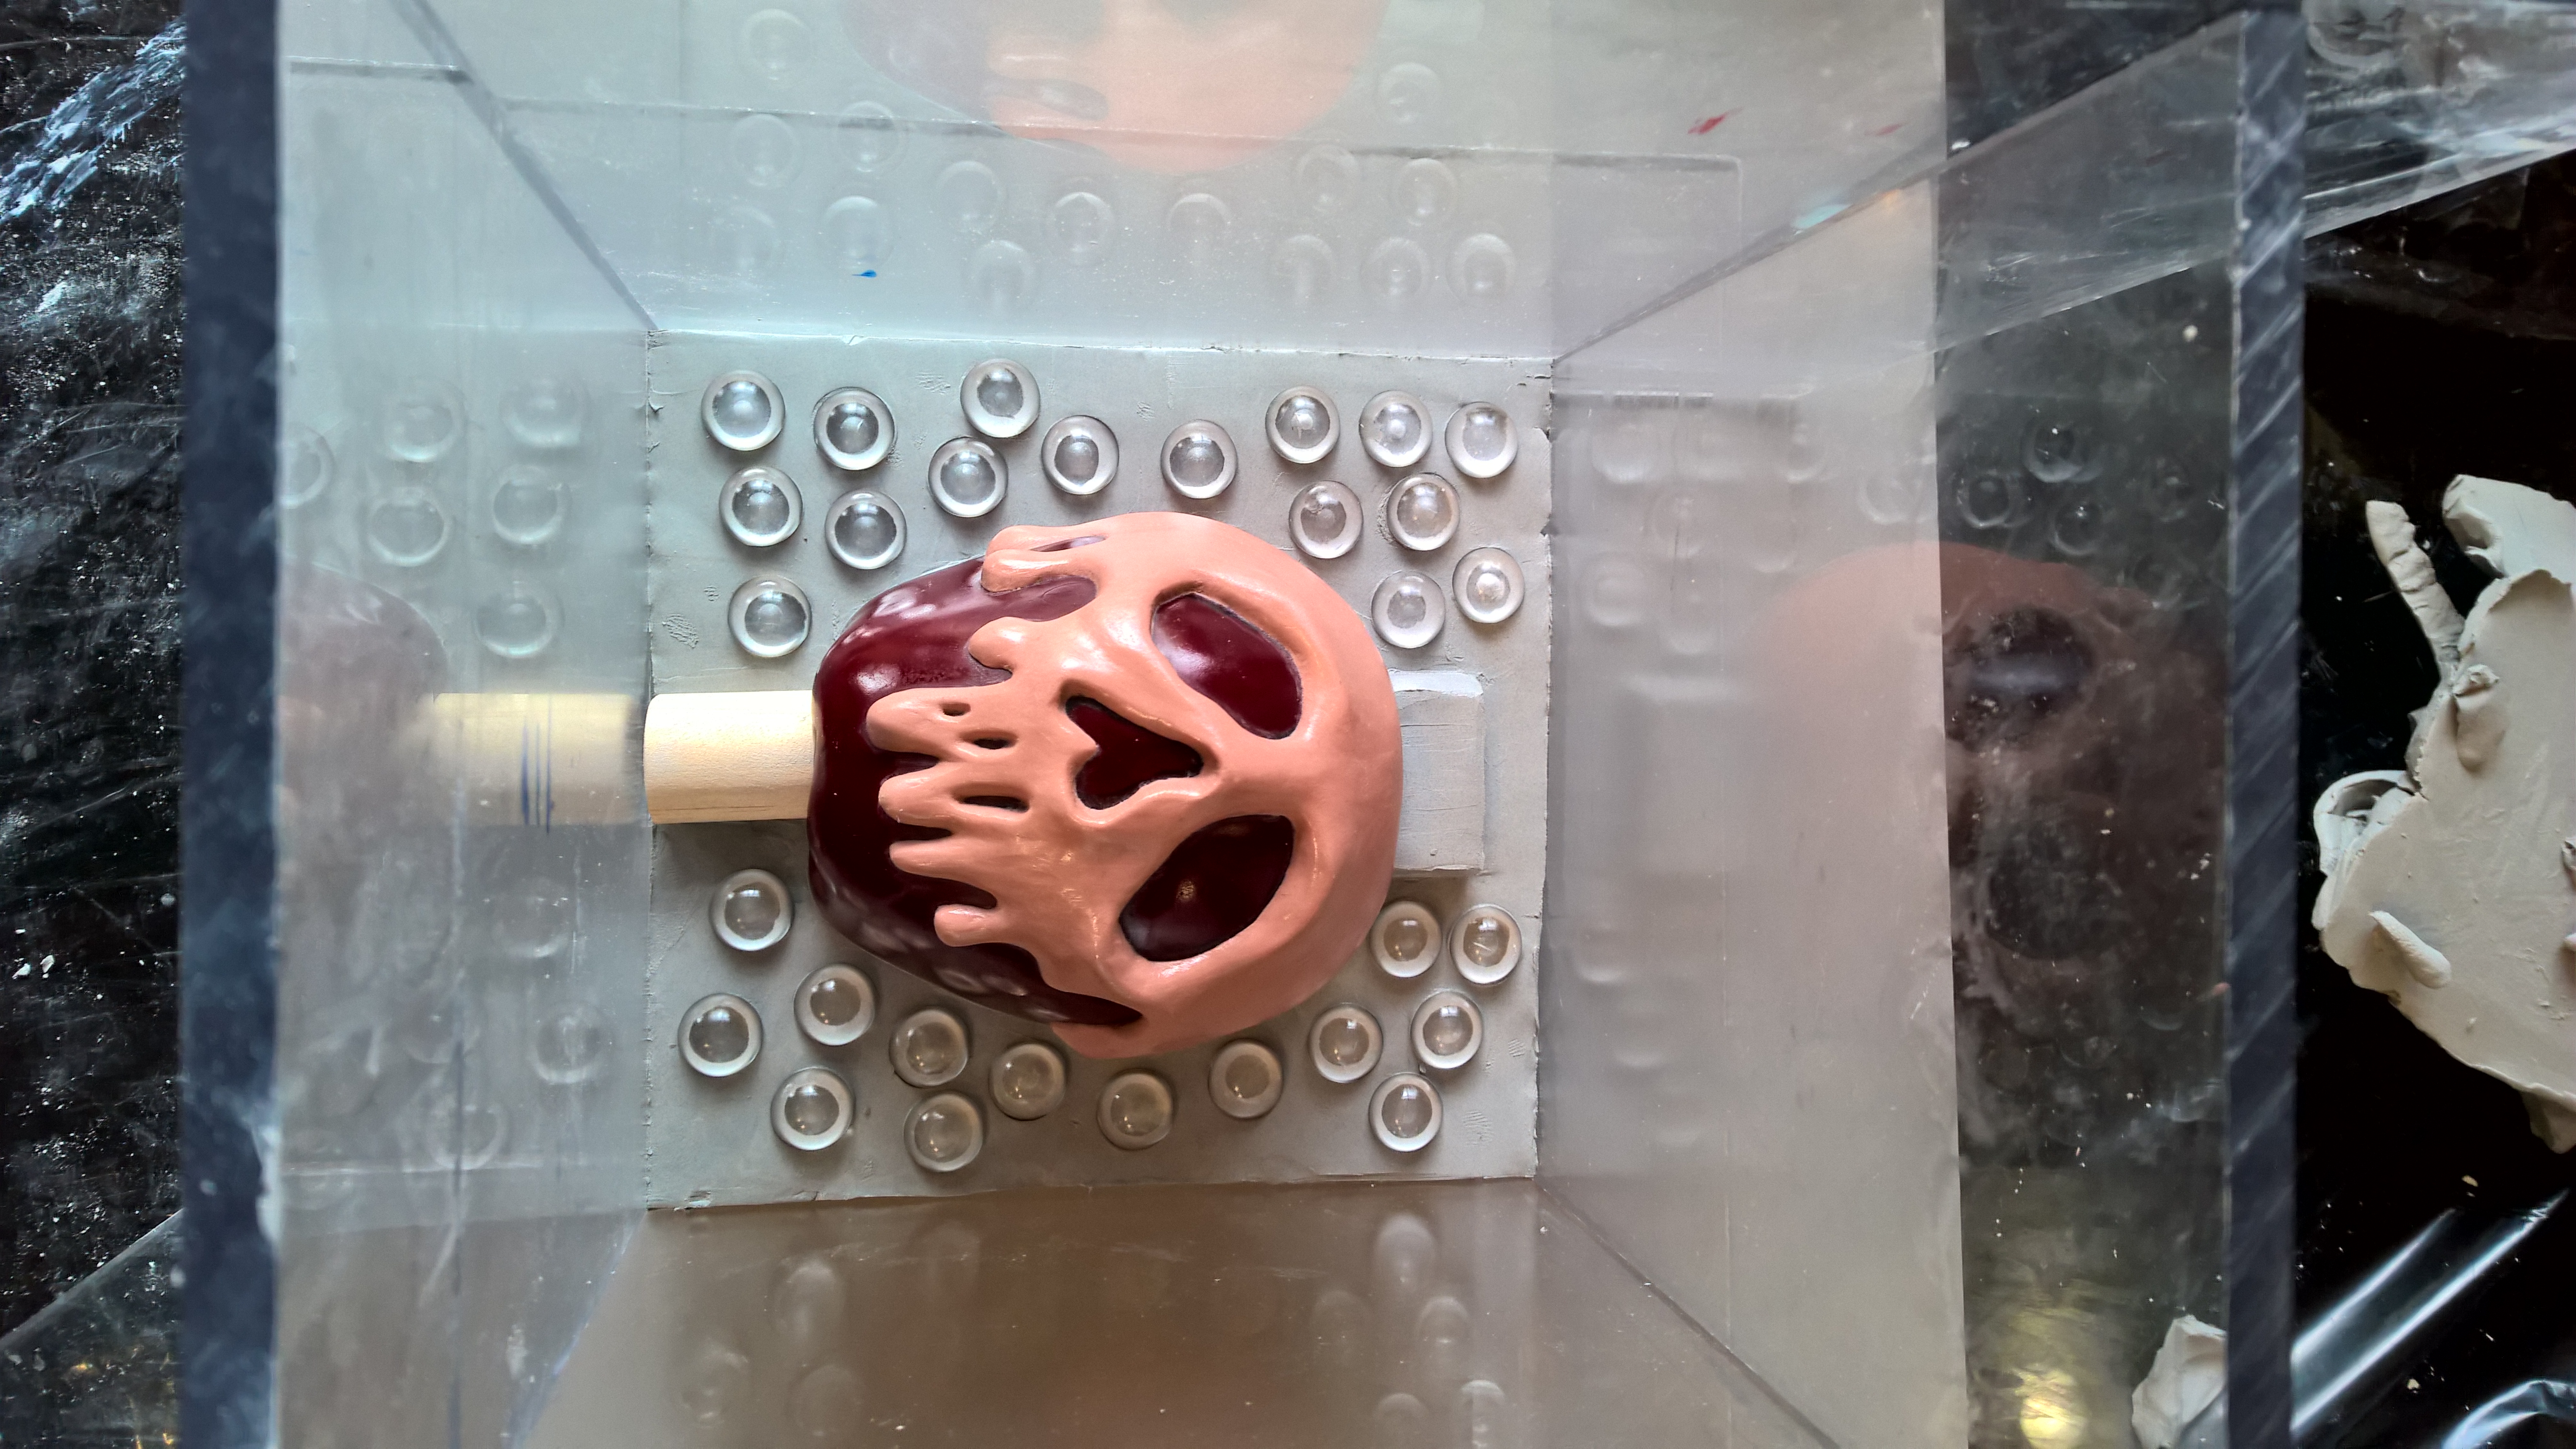
I was lazy on the pictures for this, so just have the one, which shows how it was set up. The apple sculpture is set in white clay, and then surrounded with acrylic. The mold itself was done as a 2-part block mold, using Mold Star 15, from Smooth-On. I didn’t make the best seam-line choices with this one, but it worked out okay.
Casting
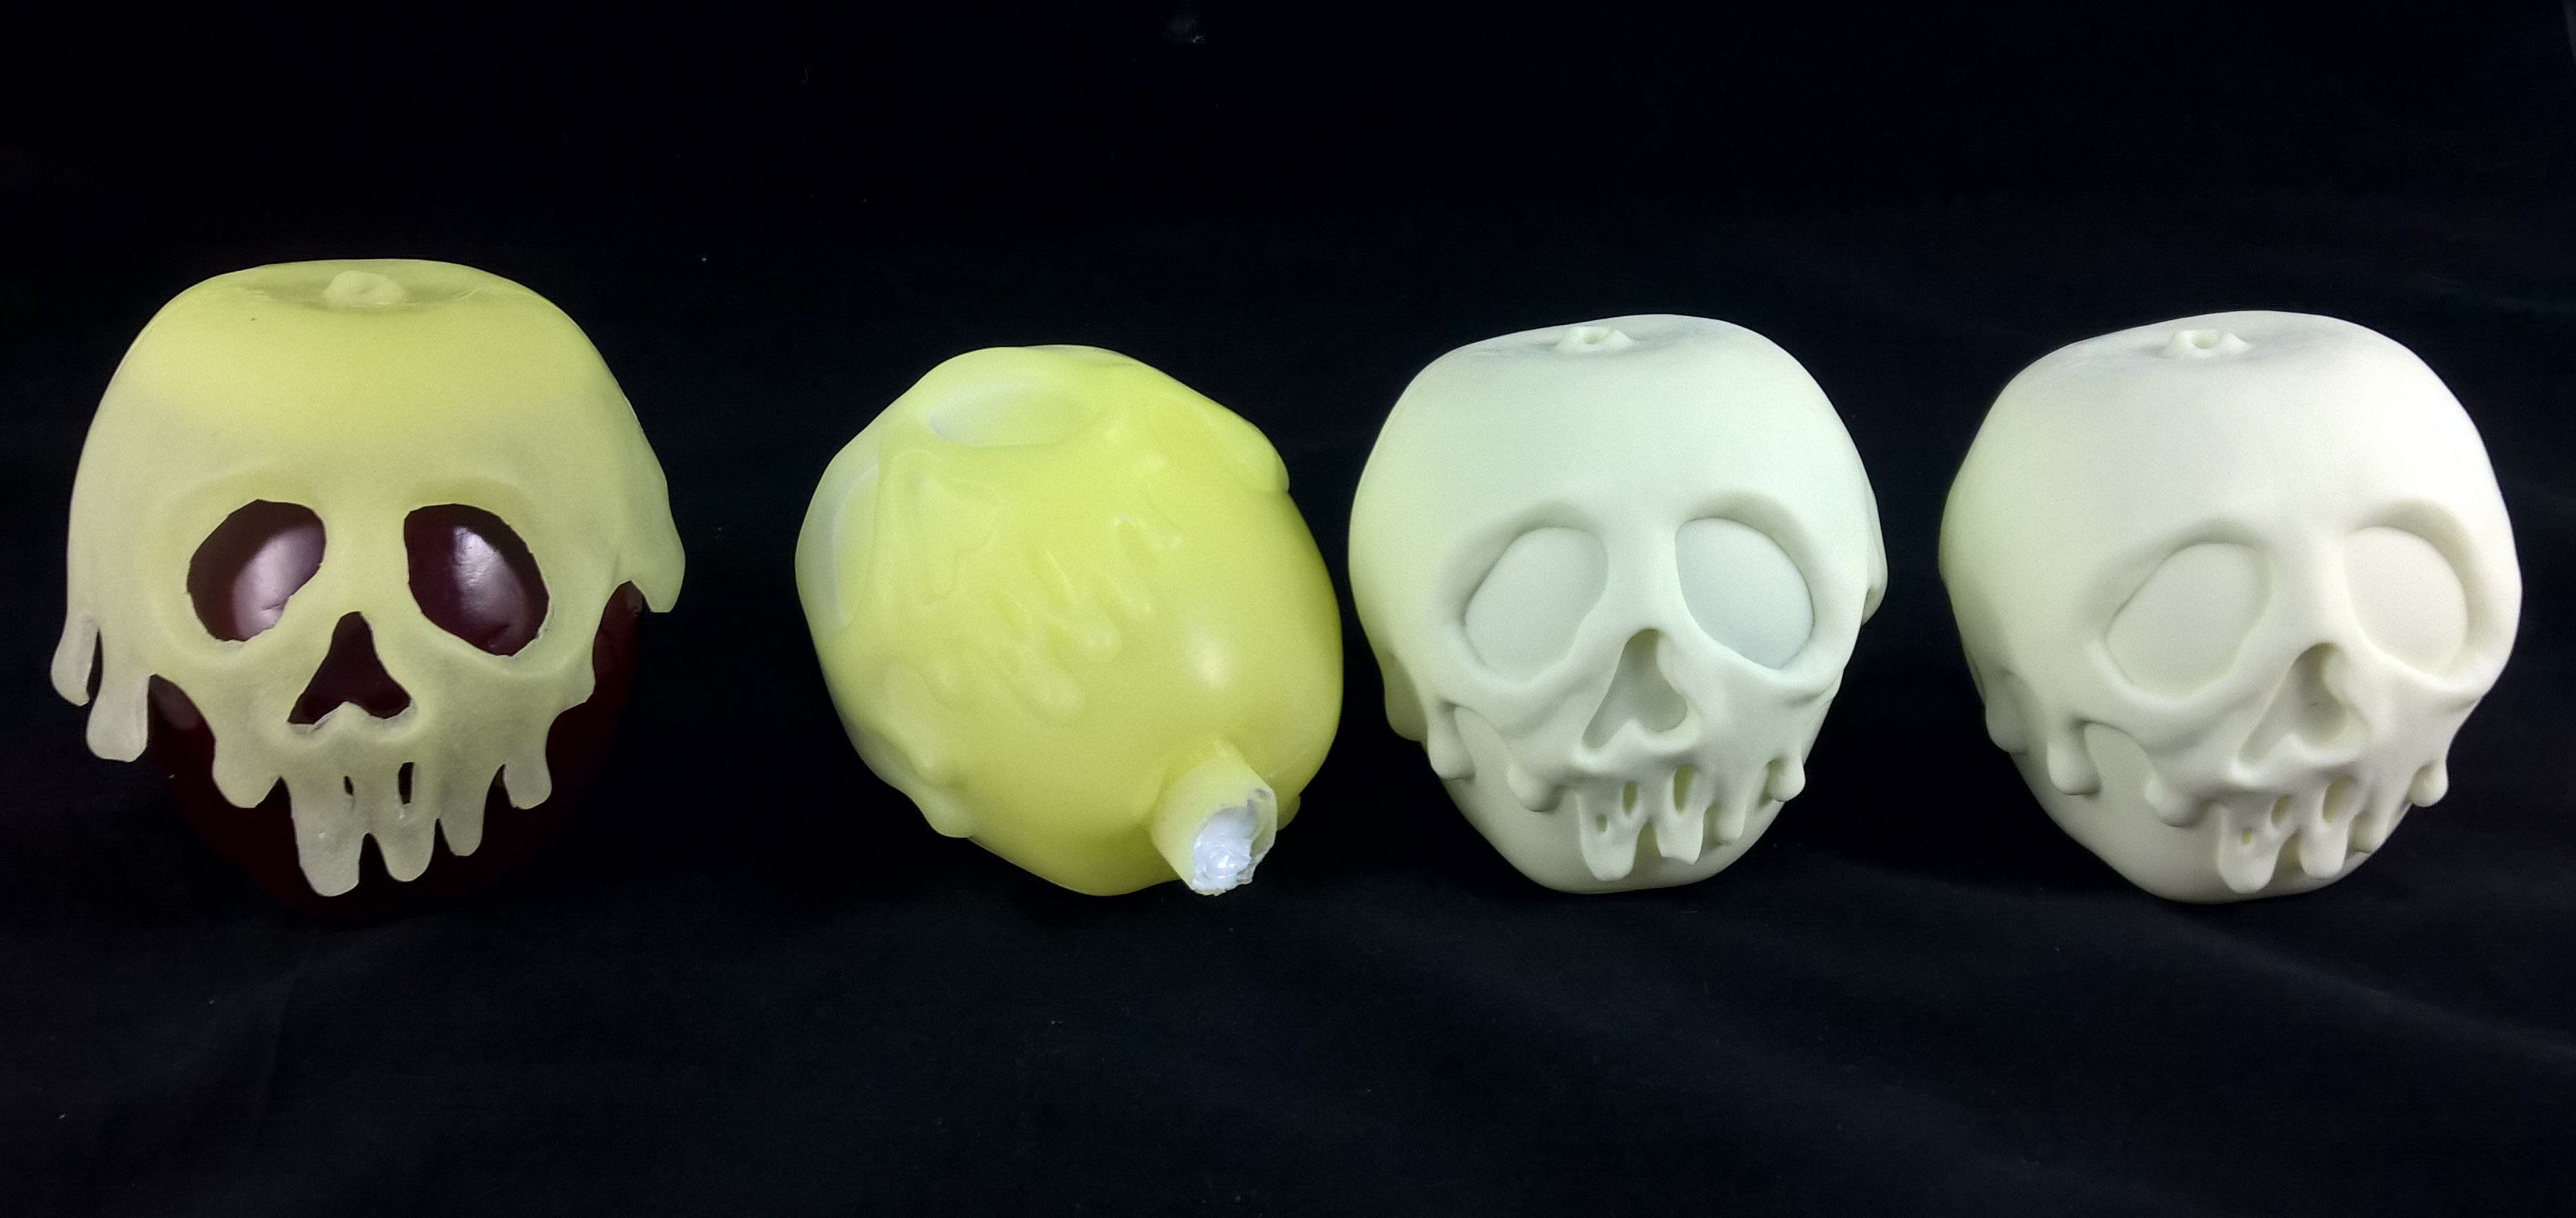
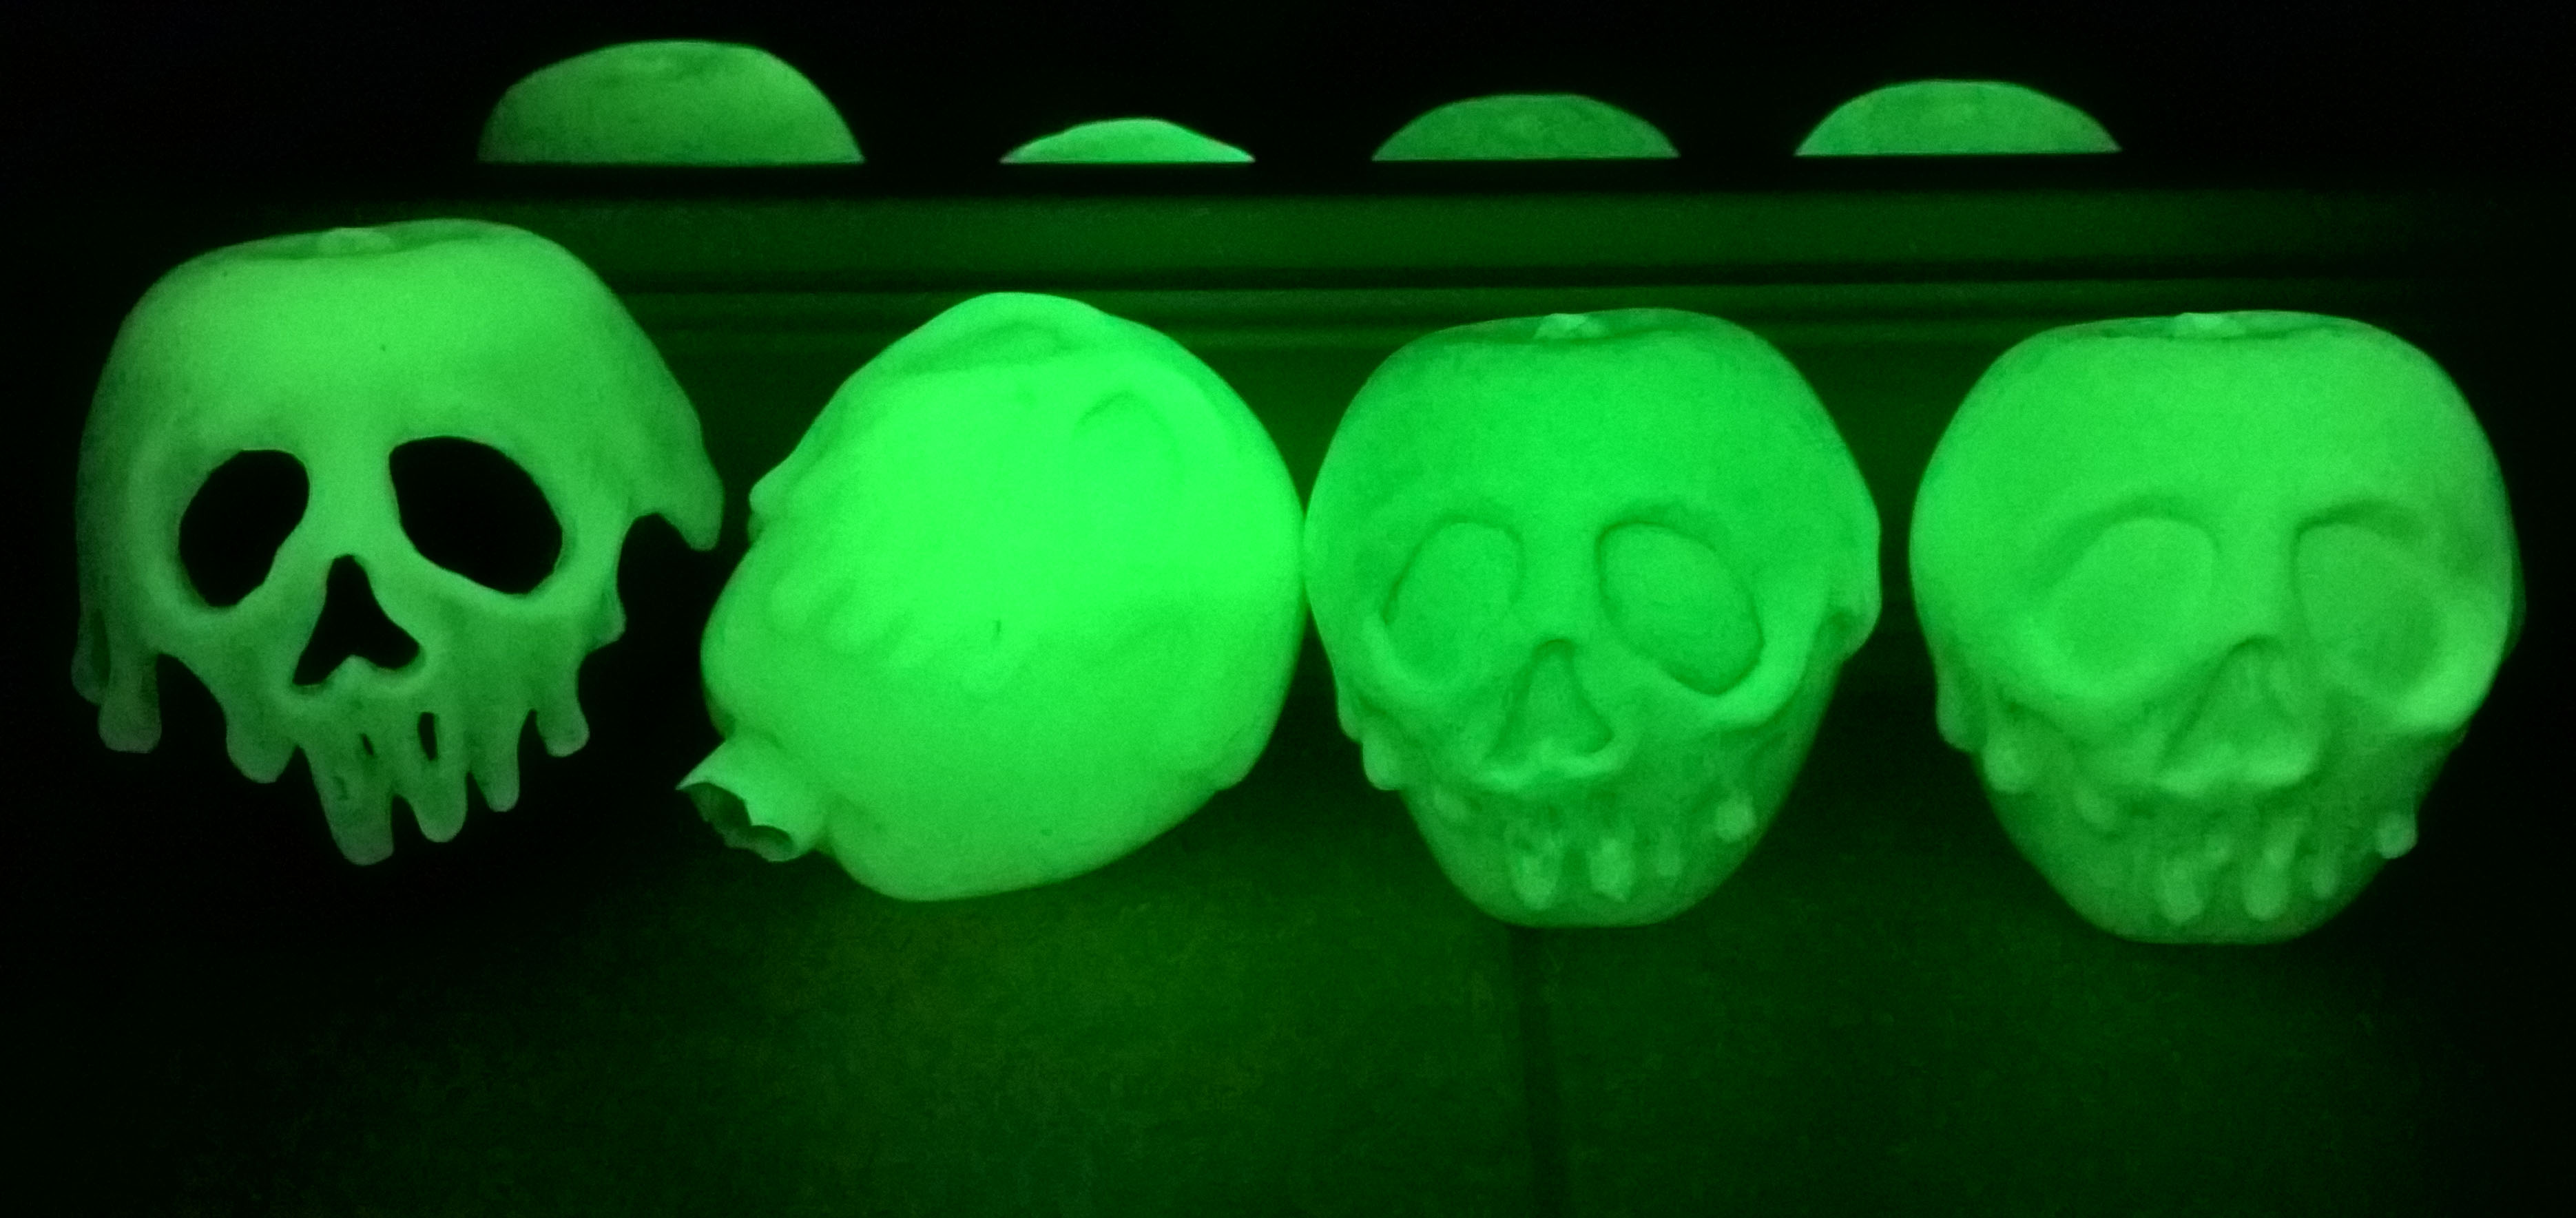
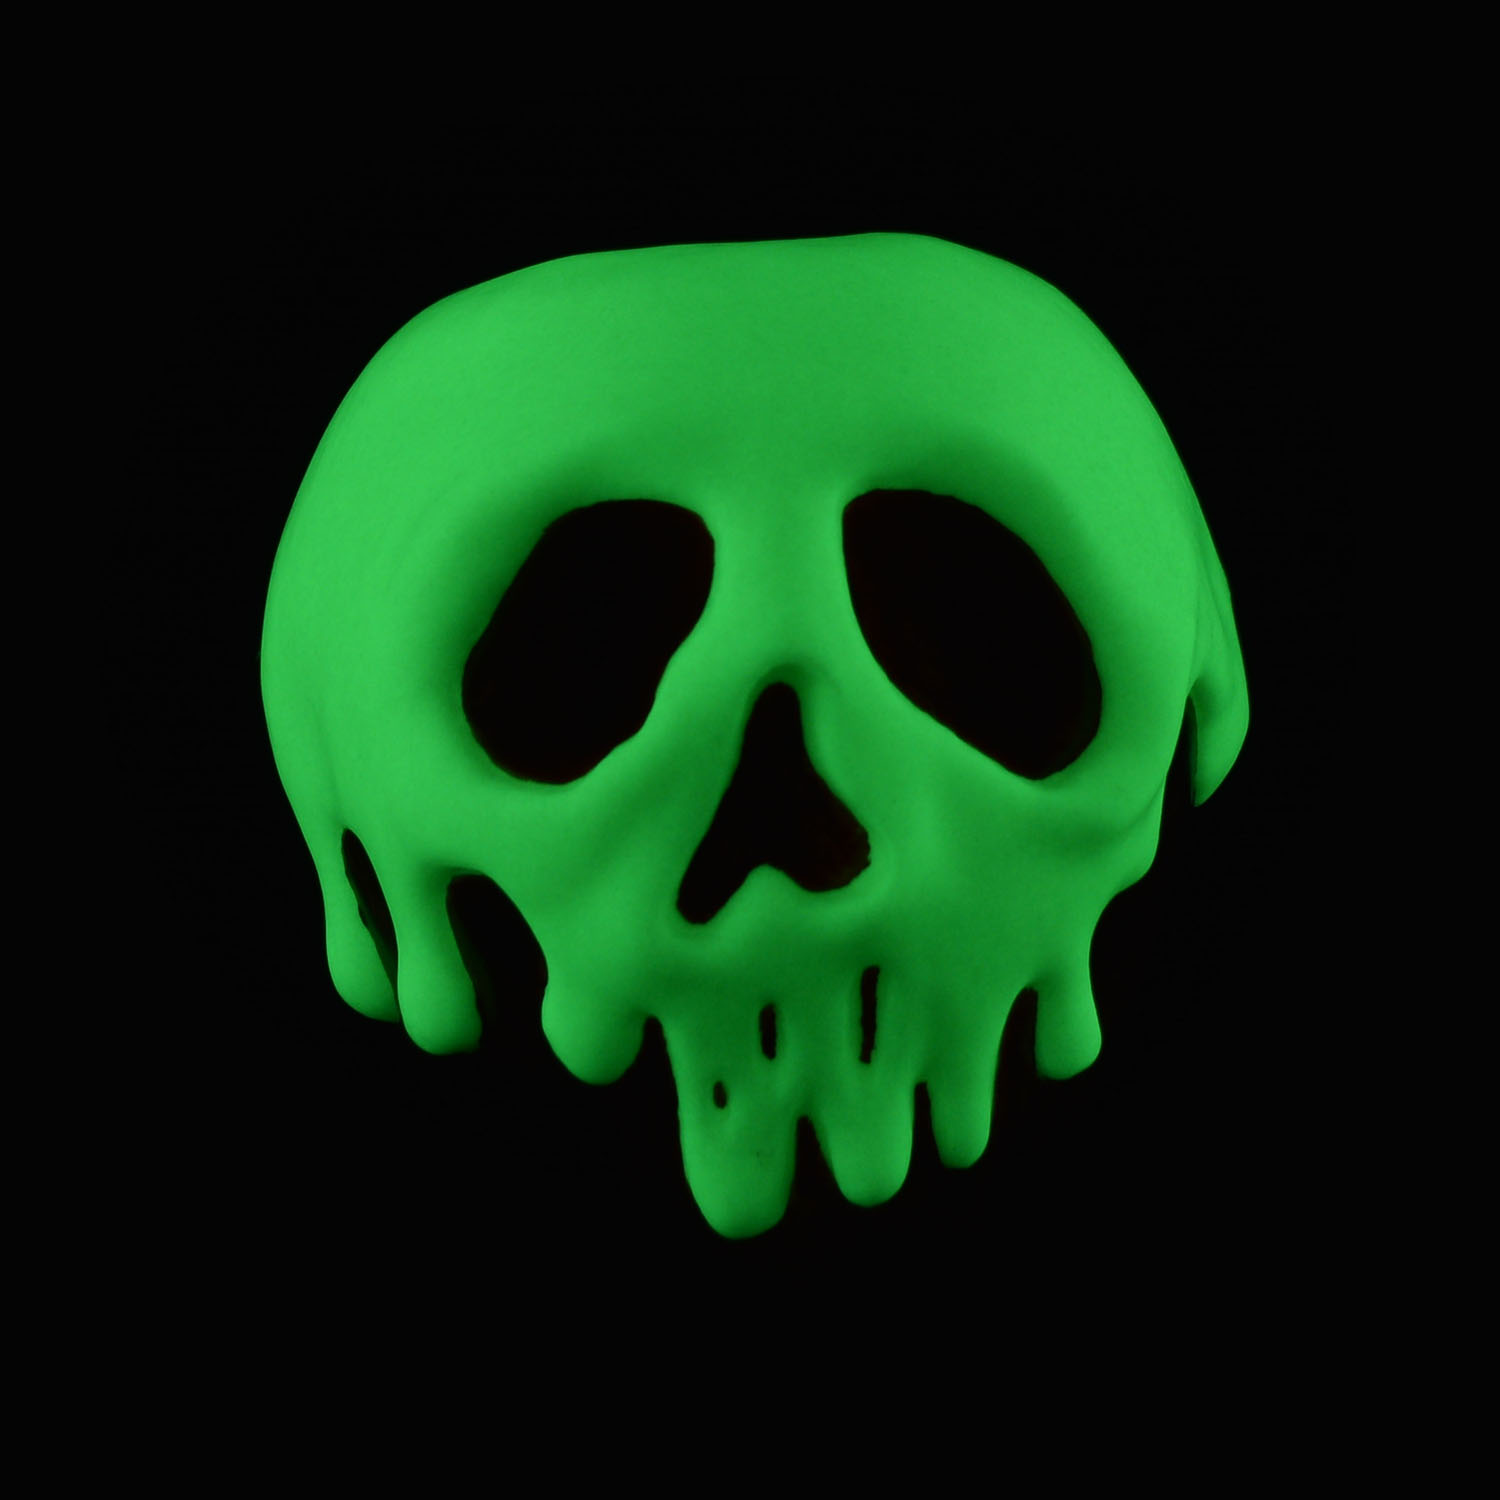
The caramel on the apple needed to glow, so a lot of testing was done with glow paints, and resin additives. None of the paint options worked very well, so things narrowed down to mixing glow powders into resin. A final round of tests were done with mixing Glow Worm Green, with Smooth-Cast 325, and 65D (all from Smooth-On). Ultimately, the mixture with 65D looked the best. It cures white, rather than translucent, and gives off a great glow, for this application. The final casts are rotocast in three layers. The first is a 1:1 mix of Glow Worm, and 65D resin. The second layer is .5:1 Glow Worm, and 65D. The final layer is just straight resin.
Wrapping Up
The seam-lines on the casts are easily sanded off, but their unfortunate placement (my fault) does mean they need to be cleaned up fairly well. Once that’s done, they’re prepped for paint by wiping them down with Kleanstrip Prep All. I’d do this, even if spraying them with primer, but in this case it’s even more important, since they can’t really be primed easily. The apple parts are painted with a Dark Scarlet acrylic paint. After two coats, over the raw greenish cast, it simulates an apple fairly well. As a final step, the whole apple, caramel and all, is sprayed with several coats of NON-UV-PROTECTIVE satin acrylic. That’s an important point, because using a UV Protective clear would have a negative effect on the glow-in-the-dark aspect.
Excellent work. Details clear. Nice visuals.
: The Evil Queen is featured in the “Snow White” episode of this anime. While her plans to dispose of her through the Huntsman and the purple laces are intact, she is shown to have an ally in the form of an old witch who provided her an old hag potion and a poison apple in exchange for a lovely room in the Evil Queen’s castle. After leaving the Seven Dwarfs’ house following Snow White eating the poison apple, she is then chased by Snow White’s friend Klaus and the Prince. She fights the Prince and Klaus until the wolves that are allied with the Seven Dwarfs showed up to aid them. The Evil Queen regresses back to her true form while trying to fight off the wolves “like a lionesses” until the wolves killed her offscreen.